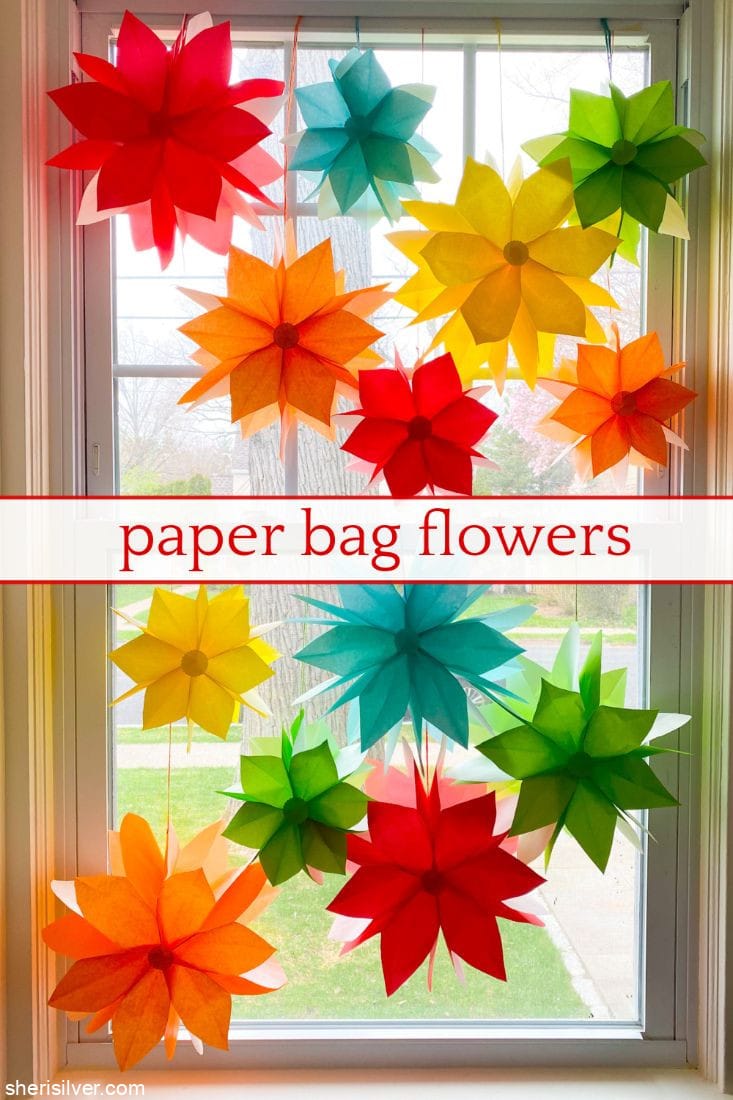
easy paper bag flowers are the pop of color you’ve been waiting all winter for!
what are paper bag flowers?
Back in December my friend Annie posted these cool paper lunch bag snowflakes and you can bet I ran to my kitchen and made them immediately. They’ve been hanging in my windows all winter long.
But by this time of year I’m ready for some color, and thought I’d turn the snowflakes into paper flowers!
I knew I wanted to start with colored paper bags, but I didn’t want to cut them in the same way since I assumed they’d come out looking like – well, colored snowflakes.

I wanted flowers so did a little search and came across a tutorial courtesy from – of course – Martha! And they were just as easy as the snowflakes.
what materials do you need?
Just like the snowflakes, you need just a few simple materials:
6 paper lunch bags
scissors
pencil
hole punch
double stick tape
string or twine

frequently asked questions!
do you need to use colored bags?
No! If you watch the video below you’ll see that I used brown lunch bags and they look just as charming!
can you use a hot glue gun instead of tape?
Yes – I’ve done both but I prefer using double stick tape personally!
can you store the flowers after you take them down?
Yes! Gently separate the sides that are taped together when you open the flower – close to store easily (if you use a hot glue gun you may want to switch to tape for that last layer, to separate without tearing the paper).
can you make the flowers in different sizes?
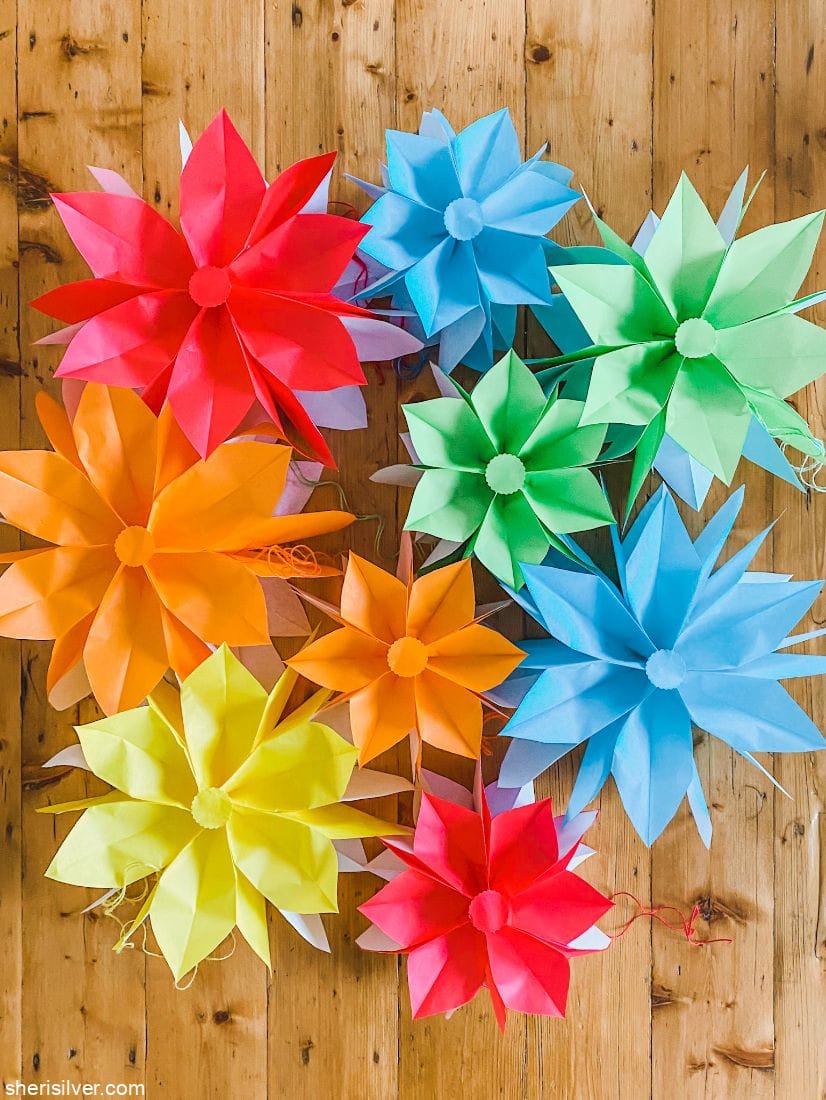
Yes! You can see that I did that here – just cut the shapes taller or shorter for a variety of sizes, or use paper bags in different sizes and shapes! You could even use shopping bags to make giant paper flowers!
Wouldn’t these make a fun wedding decoration? I also love the idea of attaching the flowers to a simply wrapped gift. Let me know if you try this fun and easy project!
SHOP THE POST!
[show_shopthepost_widget id=”4428244″]

Easy Paper Bag Flowers!
Equipment
- scissors
- pencil
Instructions
- Fold down the bottom flap on the side of the bag where it's folded up, so that it meets the other side.
- Stack the bags together and cut the bottoms off right above the fold.
- Draw a petal shape on top and cut along the lines.
- Put a piece of tape on each side of each bag as shown in the picture and stack the bags again.
- Punch a hole in the center of the bags, about 1/2" above the bottoms and run the string through.
- Bring the top and bottom layers together and join.
- If you're feeling extra you can cut or punch a circle to cover the center.
- Hang as you please!
Notes
- You can use a hot glue gun instead of double stick tape if you prefer.
- To store flat, gently separate the layers you attached to make the final flower shape.
- To make flowers in different sizes, simply cut the shape of the flower higher or lower as you please!
Here are some more easy crafts to keep big (and little) hands busy:
Please note that this post contains affiliate links. As a Rewards Style influencer I earn a small commission from qualifying purchases – at no additional cost to you.
6 Comments
Leave a Comment

Hi! I'm Sheri!
Welcome to my little corner of the web where you’ll find easy, delicious recipes, the best kitchen hacks and simple tips for turning your home into a clean haven that is free of toxins. So glad you’re here!

Hi Sheri,
These are so beautiful and cheerful – a real treat for all, both inside and outside your home.
Thank you so much! They make me happy every time I pass by them! 🙂
Sheri! These are amazing! I love how the light filters through them! You are so creative!
Thank you Annie! 14 is better than 4, don’t you think? 😉 xo
Came over from Annie’s blog and these are so nice & cheery. Reminds me of all the bright colors of Fiesta time in April in San Antonio, Texas. Looking forward to making these. Thanks for sharing the how-tos.
Thank you so much – I needed these pops of color here in New York right now! 🙂