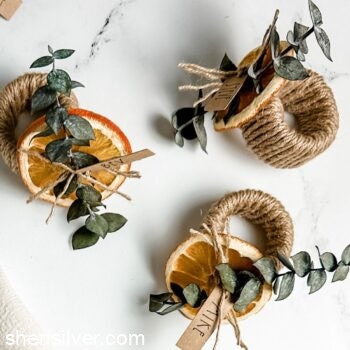
these easy cardboard tube napkin rings are perfect for your spring table!
Love a good, easy DIY – and it doesn’t get easier than these cardboard tube napkin rings!

spring is here!
Spring is here, and if you live in the north like I do, it cannot come soon enough. For me, the season officially kicks off with Passover, which this year begins next Wednesday. We have a nice large group coming which always makes me happy, and I’ve been thinking about the table setting for some time.
napkin rings FTW again!
I got SO much great feedback on the napkin rings I made last year, and wanted to create another version for my Passover table. Napkin rings are one of my favorite ways to dress up a table because they add a decorative element without taking up any extra room. And if you make your own you can customize the look to complement your home decor!
cardboard tubes FTW again!
You ALSO loved the toilet paper roll gift boxes I shared a few months ago (35,000 views on Instagram when I last checked!). I still had a bunch of toilet paper rolls left over from that project and knew they’d make perfect DIY napkin rings.

what do you need to make these toilet paper tube napkin rings?
You just need a few simple items to make this craft:
- cardboard tubes – from toilet paper rolls, a paper towel roll or gift wrap
- twine – I like to use twine that is not too thick or thin. Too thick will make the ring too bulky and heavy looking. Too thin will make it take much longer to wrap around the tube. A 4mm thickness is perfect, and I’ve linked to what I used!
- dried orange slices – I love the look of dried orange slices, but feel free to use what you like – any citrus will work as well as dried apple or pear slices for a more fall/winter vibe.
- eucalyptus sprigs – longtime readers know that I love preserving fresh eucalyptus. A friend gifted me a bunch a while back and I was storing them until I figured out what I wanted to use them for. Of course you can use fresh eucalyptus or any other decorative green – snip off branches from bushes or trees outside your house, or use sprigs of sturdy herbs like rosemary or thyme! A cinnamon stick would look pretty too (and smell great!).
- paper or card stock – if you want to add a name tag!
- scissors
- ruler
- hole punch
- utility knife
- self-healing cutting mat
SHOP THE POST!
[show_shopthepost_widget id=”4970961″]
how do you make them?
This is one of the easiest crafts you’ll ever make – no special skills or equipment needed (not even a glue gun)! Here’s how you do it:
Cut a cardboard tube into one-inch sections:

Take your pre-cut length of twine, double it up, and place the looped end on the outside top edge of the tube, letting the loose ends hang down:
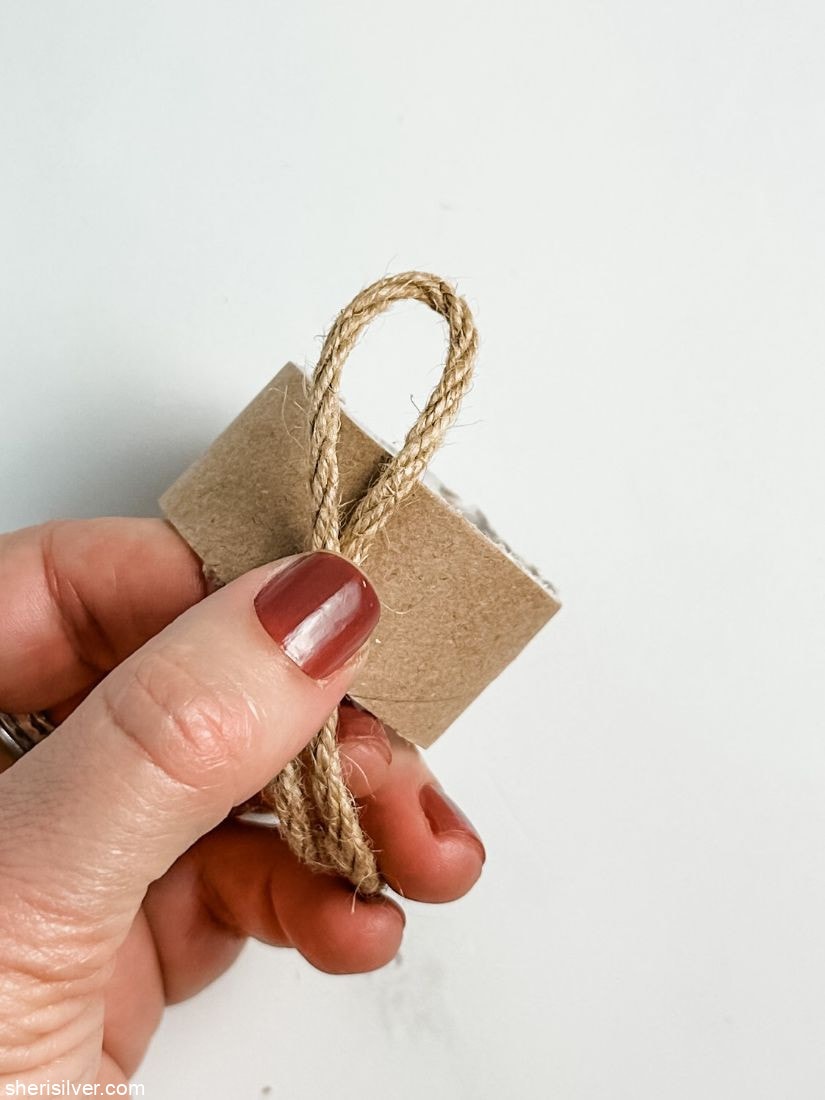
Bring the loose ends up through the inside of the tube, to the top:

Now thread those ends through the loop:

Pull to tighten:

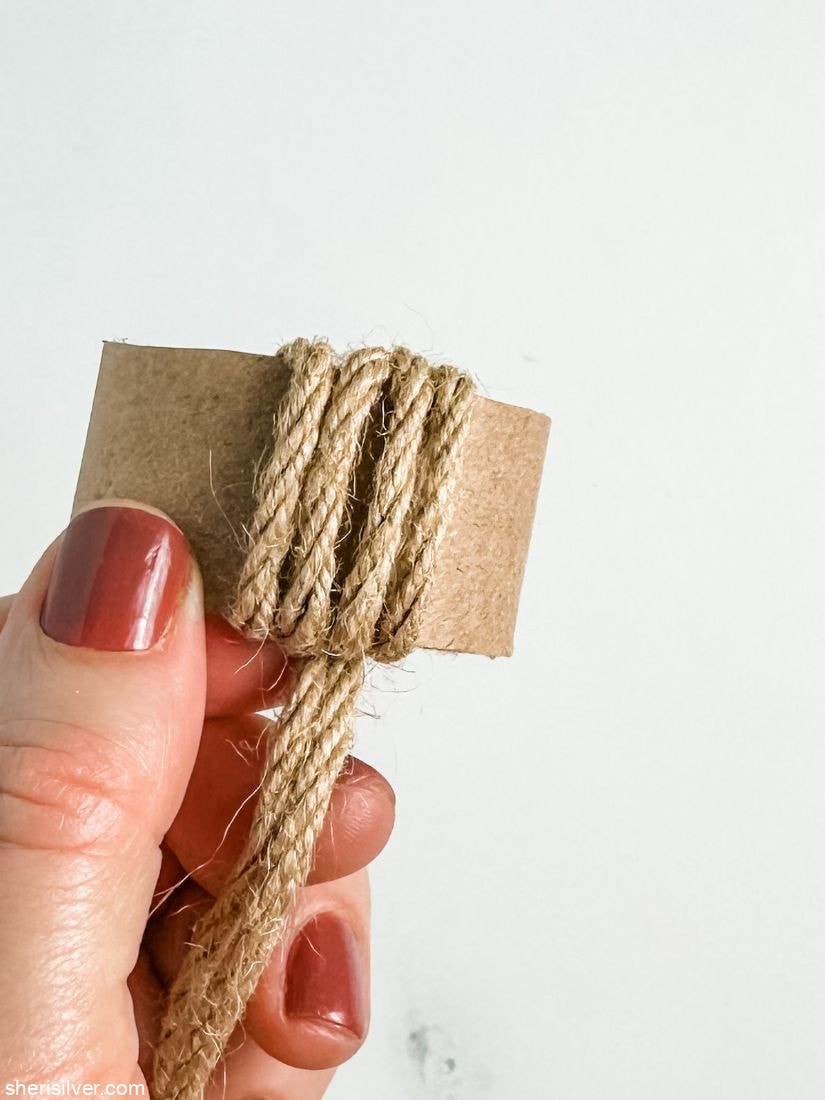
Now bring those ends over the loop and back through the bottom of the tube:

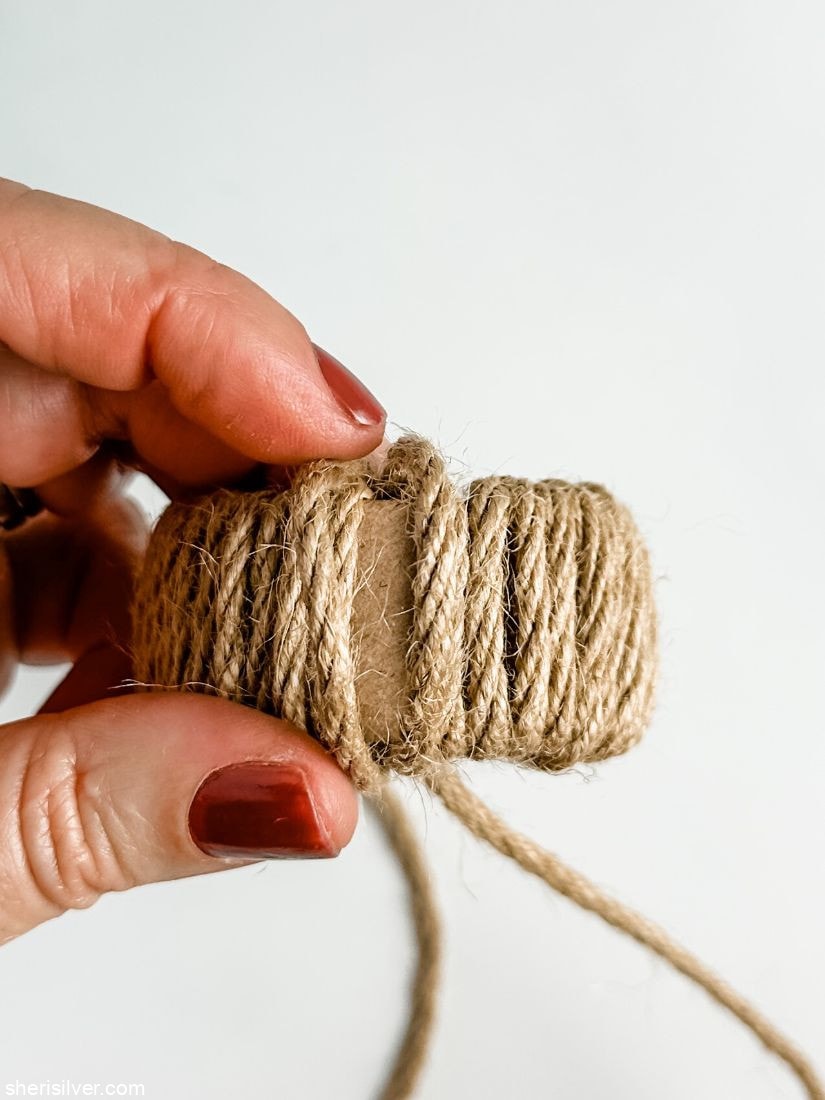
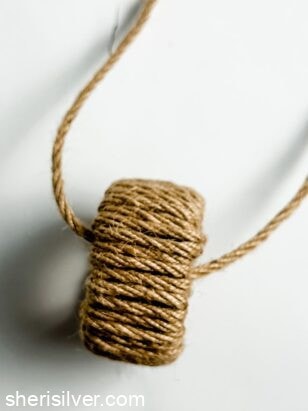
And start winding the twine up, over and through the tube, working your way around:

When you reach the last section, bring the ends through the bottom and loosen the last two pieces of twine, to create two “loops”:
Bring the right piece up and through the right “loop” and the left piece through the left:
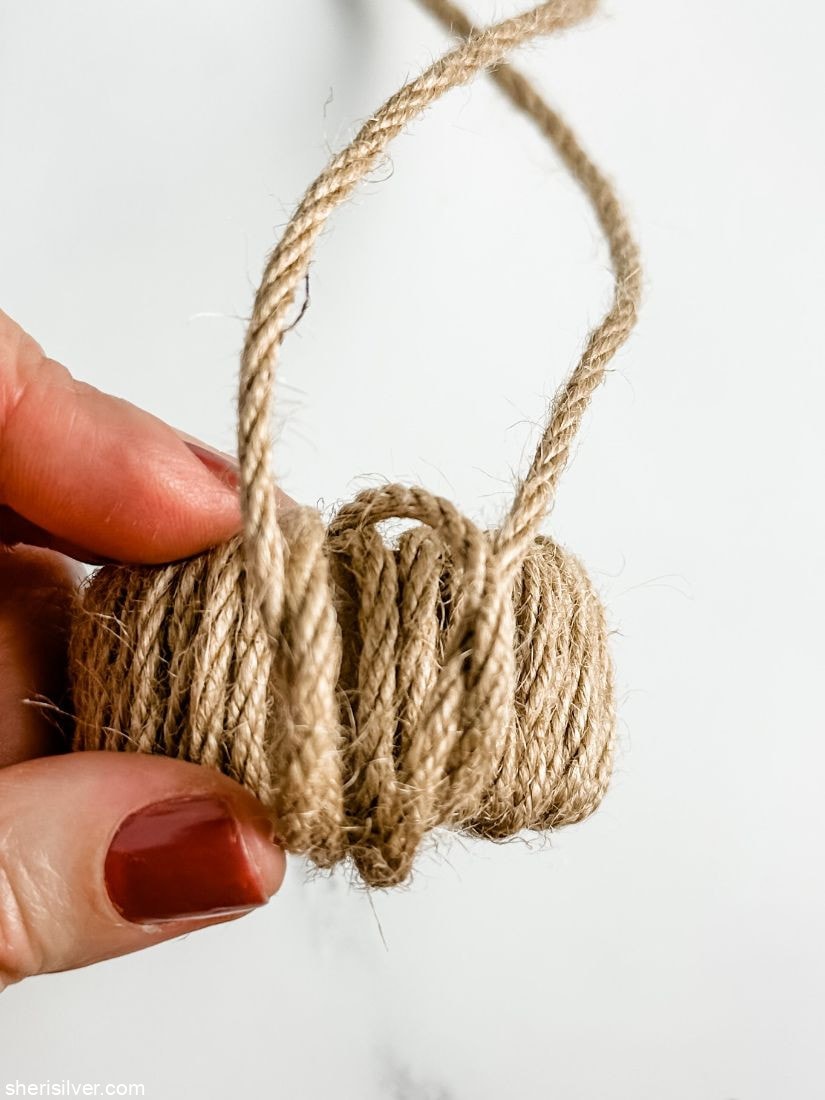
Pull to smooth and tighten, making sure all the twine is laying flat against the tube:

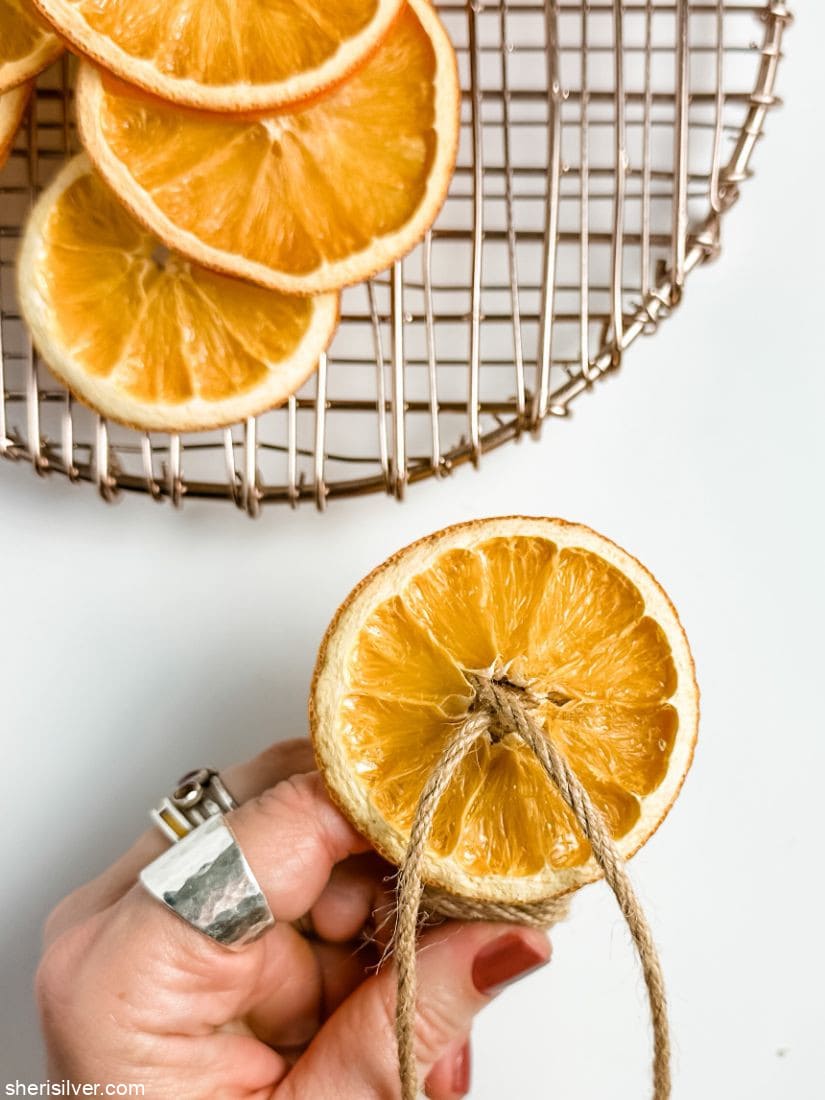
Pull the ends through an orange slice and tie on a eucalyptus sprig:

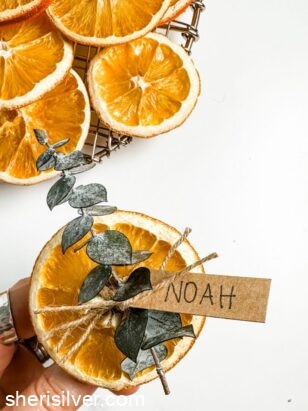
Attach a name tag if you like!
I like to undo the ends of the twine for a lighter look.
It’s that simple!

I just love the pop of color these little rings provide, without clashing with the mostly neutral vibe of my table.
Let me know if you make them, and how you customize the look!

Cardboard Tube Napkin Rings
Equipment
- ruler
- scissors
Ingredients
Instructions
- Cut the cardboard tube into one-inch sections. Cut a 12-foot length of twine.

- Fold the twine in half and place the looped end on the outside top edge of the tube, with the loose ends hanging down.

- Bring the loose ends inside and up through the top of the tube.

- Thread the ends through the loop and pull to tighten.

- Bring the ends over the loop and back through the inside of the tube.

- Begin winding the twine up, over and through the tube, working your way around.

- When you reach the last section, bring the ends through the bottom and loosen the last two pieces of twine, to create two "loops".

- Bring the right piece up and through the right "loop" and the left piece through the left.

- Pull to smooth and tighten, making sure all the twine is laying flat against the tube.
- Pull the ends through an orange slice and tie on a eucalyptus sprig.

- Attach a name tag if you like!
- Undo the twine to create individual strands, and trim as desired.
Please note that this post contains affiliate links. As a Rewards Style influencer I earn a small commission from qualifying purchases – at no additional cost to you.


Hi! I'm Sheri!
Welcome to my little corner of the web where you’ll find easy, delicious recipes, the best kitchen hacks and simple tips for turning your home into a clean haven that is free of toxins. So glad you’re here!
