just in time for Valentine’s Day, here’s how to make a paper gift bag!
In this post I’ll show you how to make a paper gift bag for sweet treats and tiny gifts – it’s so easy!

you all loved my cardboard tube gift box tutorial!
My post and video showing how to make a cardboard tube gift box was one of my most popular last year! And since you’ve also told me you want more easy DIY’s I thought I’d share this how-to for a paper gift bag!

all you need is a piece of paper for these easy diy gift bags!
There are no tools or materials needed for making these diy paper gift bags. Just take any square piece of paper – it can be gift wrapping paper, butcher paper or scrapbook paper – and fold!
I love the idea of using what you have, and love even more that this version comes together without the use of any glue or tape. It is a super easy craft and a perfect vessel for any small treats or gifts.
I’ve shared a video below, showing how I make these paper bags, but here are some step by step pictures to break it down:
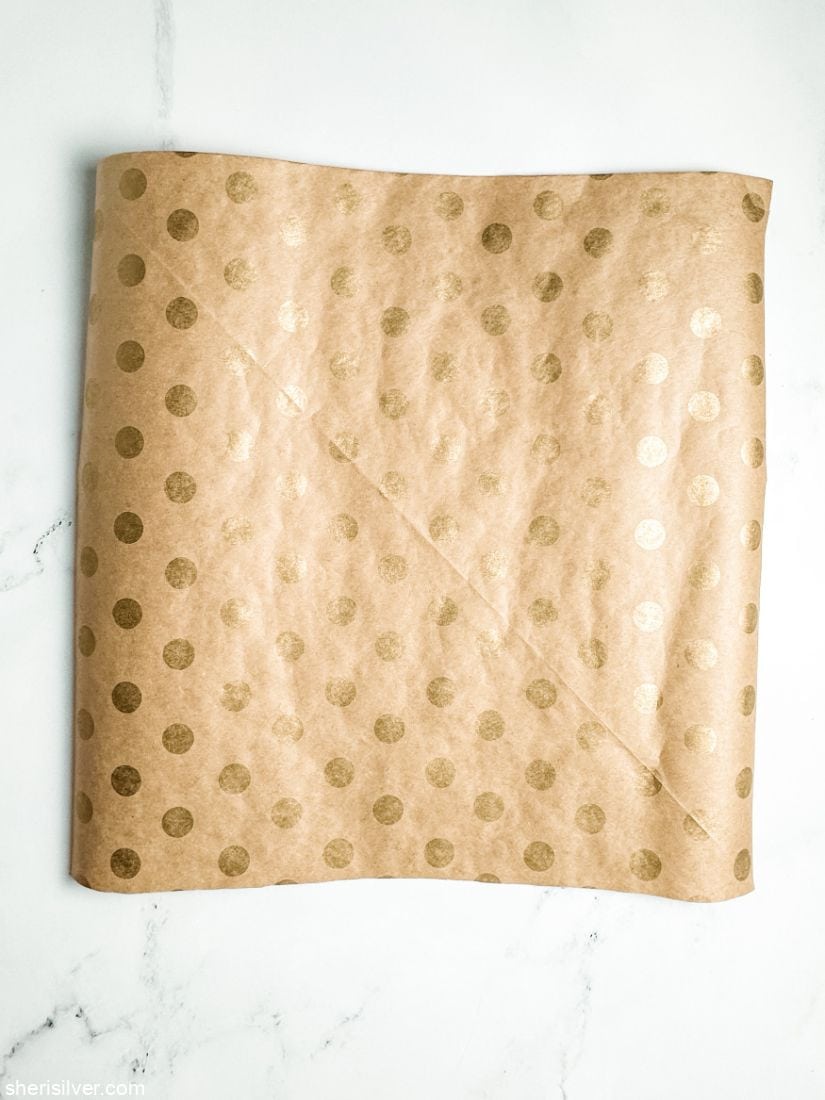
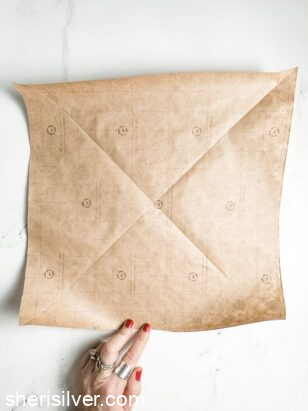
Start with a square piece of paper – anywhere from 12″ to 16″ is a good size range to use.
Fold the paper diagonally in both directions.

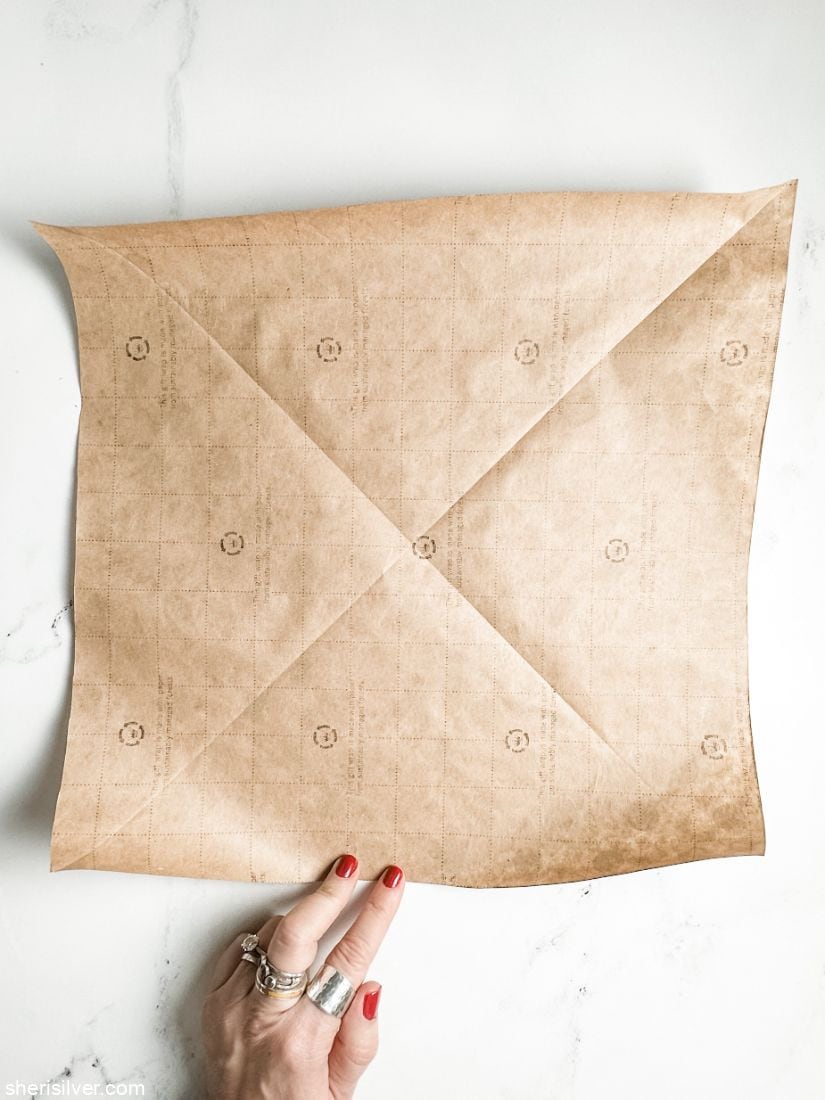
With the printed side facing up, fold the paper from top to bottom and then side to side.

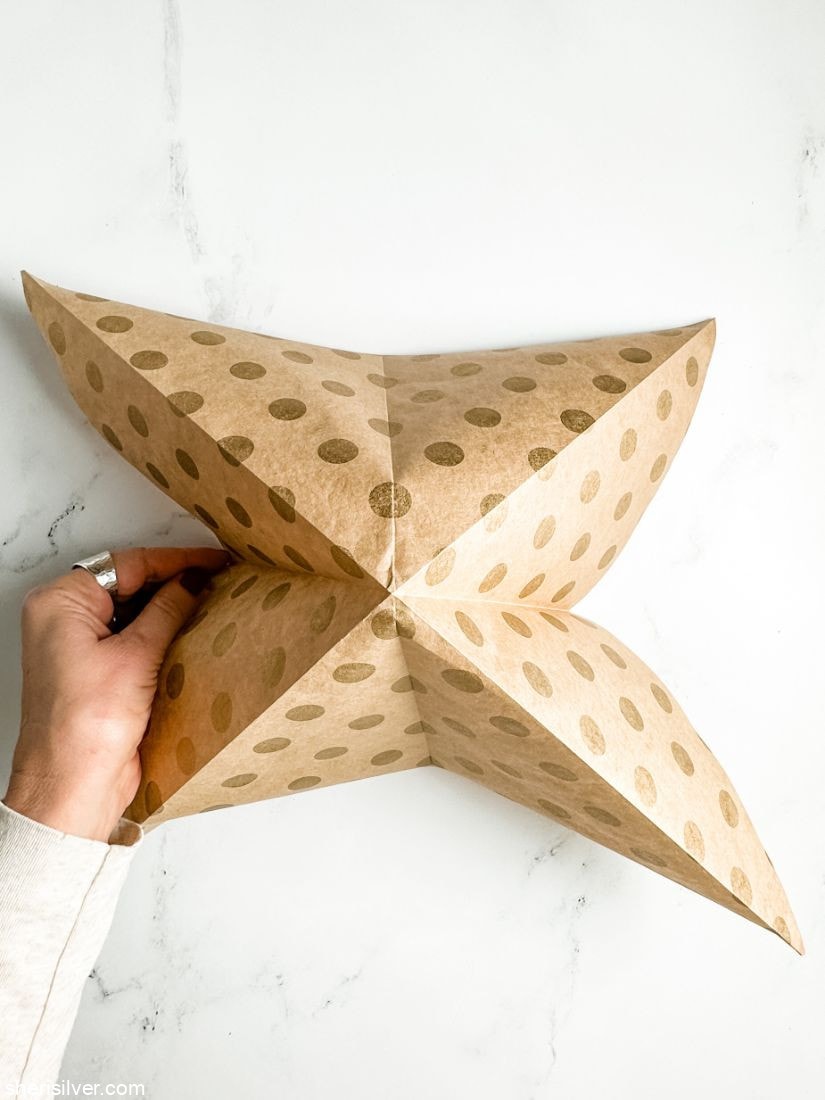
Use your hands to lift the paper by the center horizontal folds – the paper should fold in on itself into a triangular shape. Press down the edges to smooth and flatten.

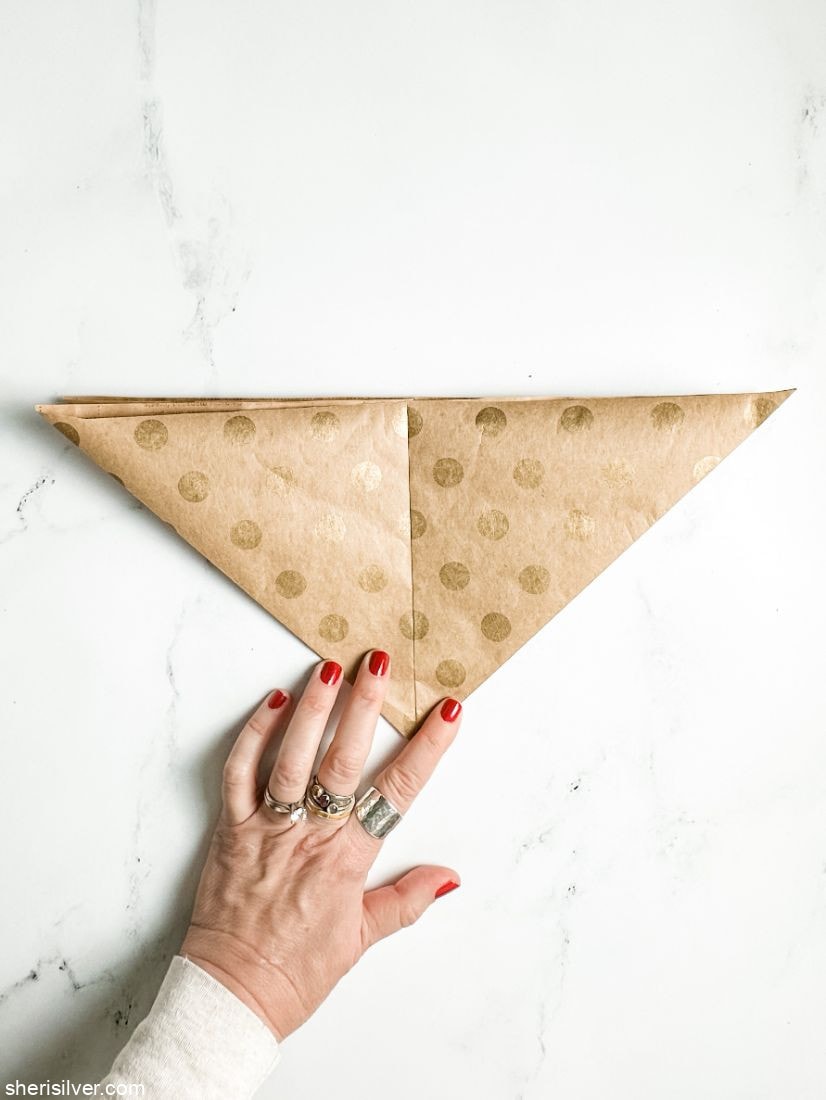
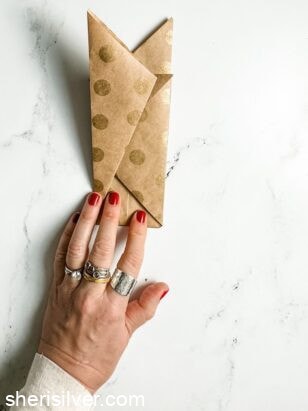
Turn the triangle so the flat edge is at the top. Fold the point at the bottom up about an inch or so.

Fold the top right point over to the left, keeping the top edges aligned.

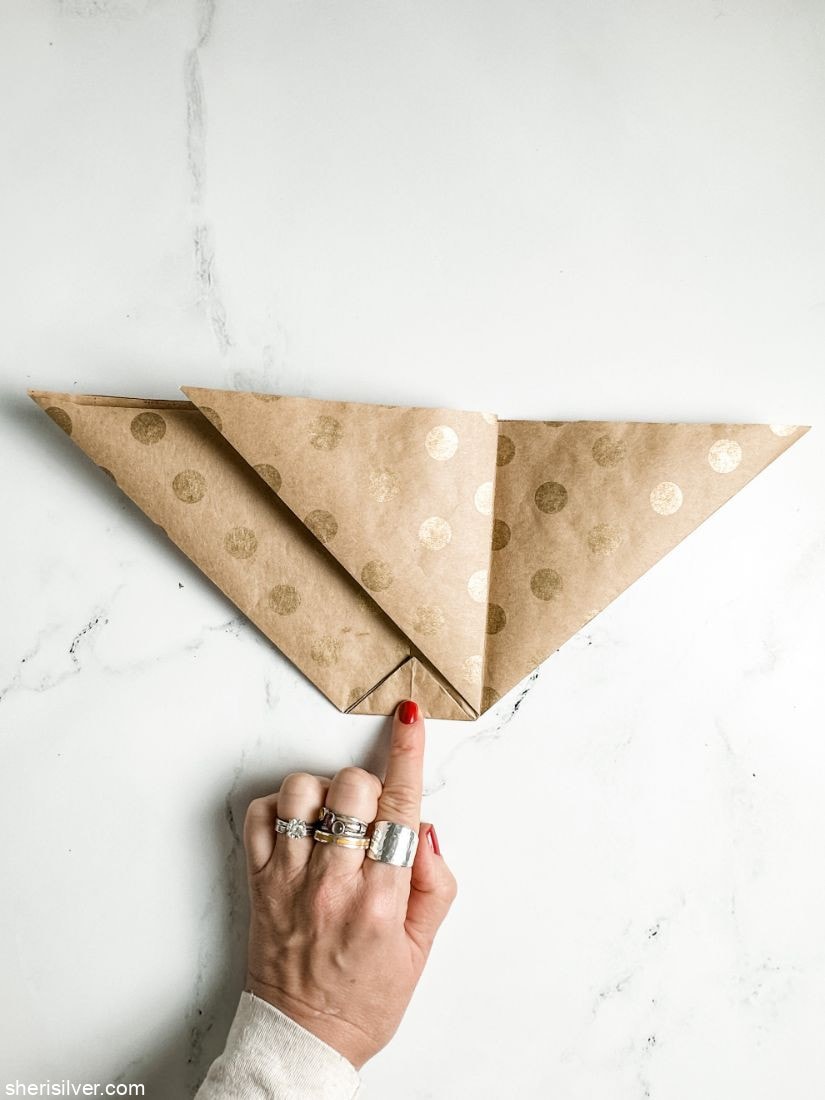
Now fold the left point over to the right.

Take that left point and fold it back on itself.
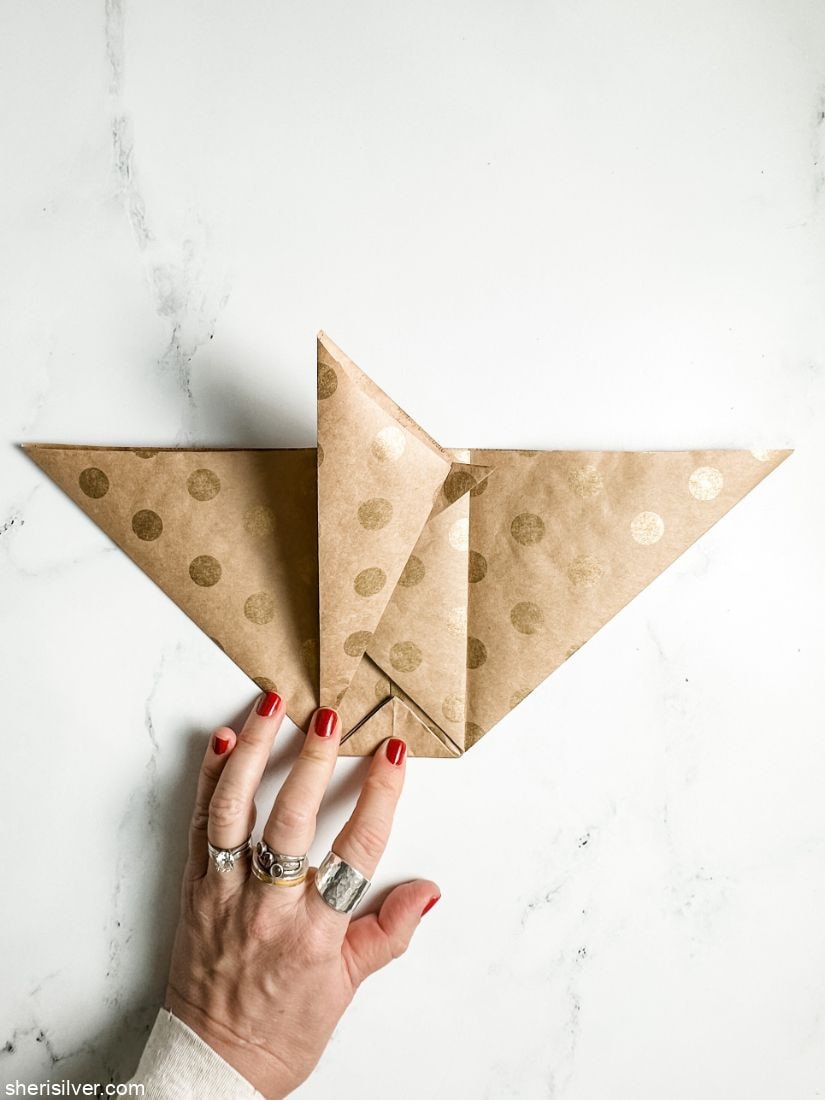
Flip the paper over and repeat on the other side.


You’ll now have two points sticking up at the top. Fold them inward and tuck into the pockets that are on the inside of the paper.
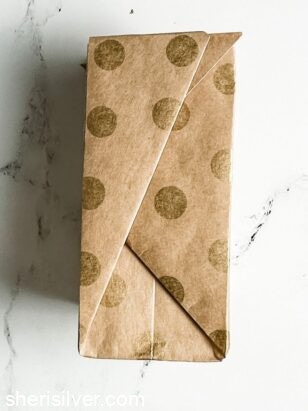
Unfold that small triangle at the bottom, then gently stick your hand into the bag and “pop” the triangle out, creating a flat bottom. Crease the edges around the bag to sturdy the shape.
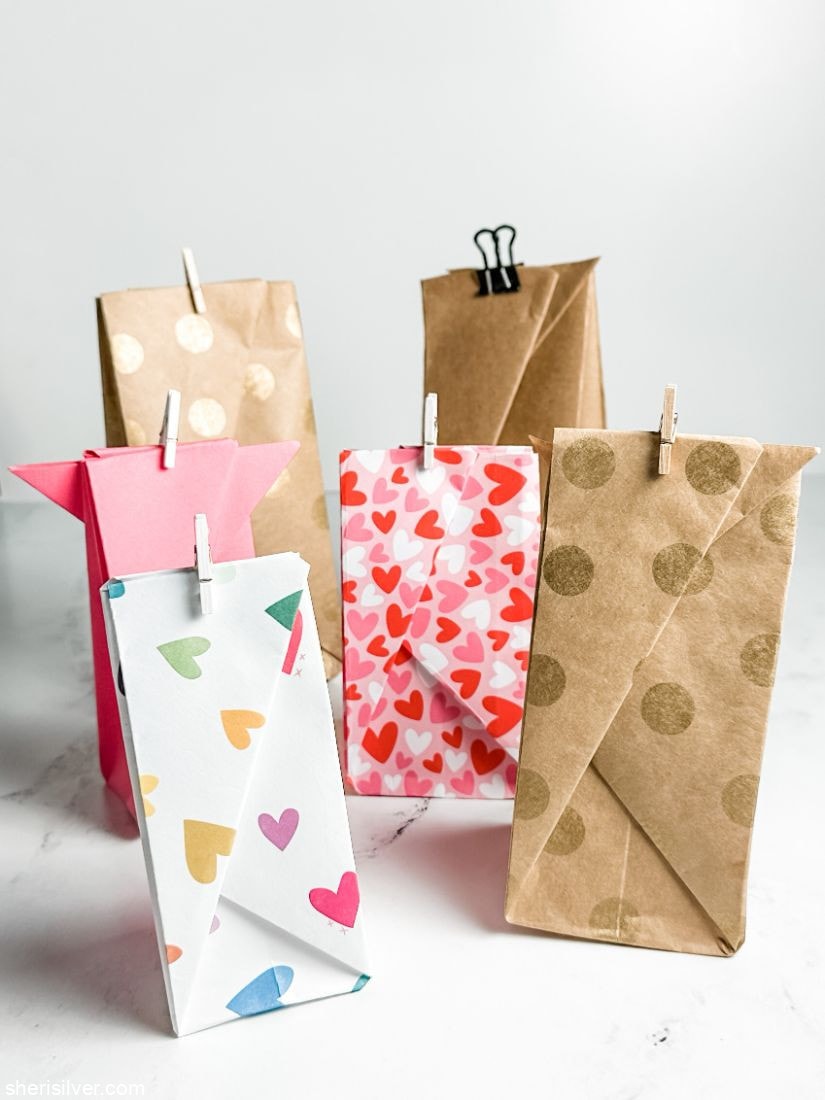
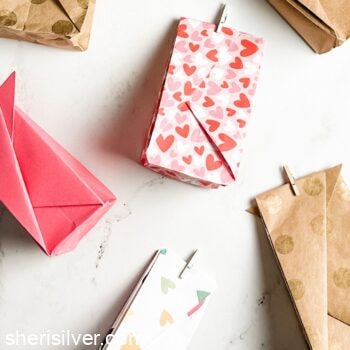
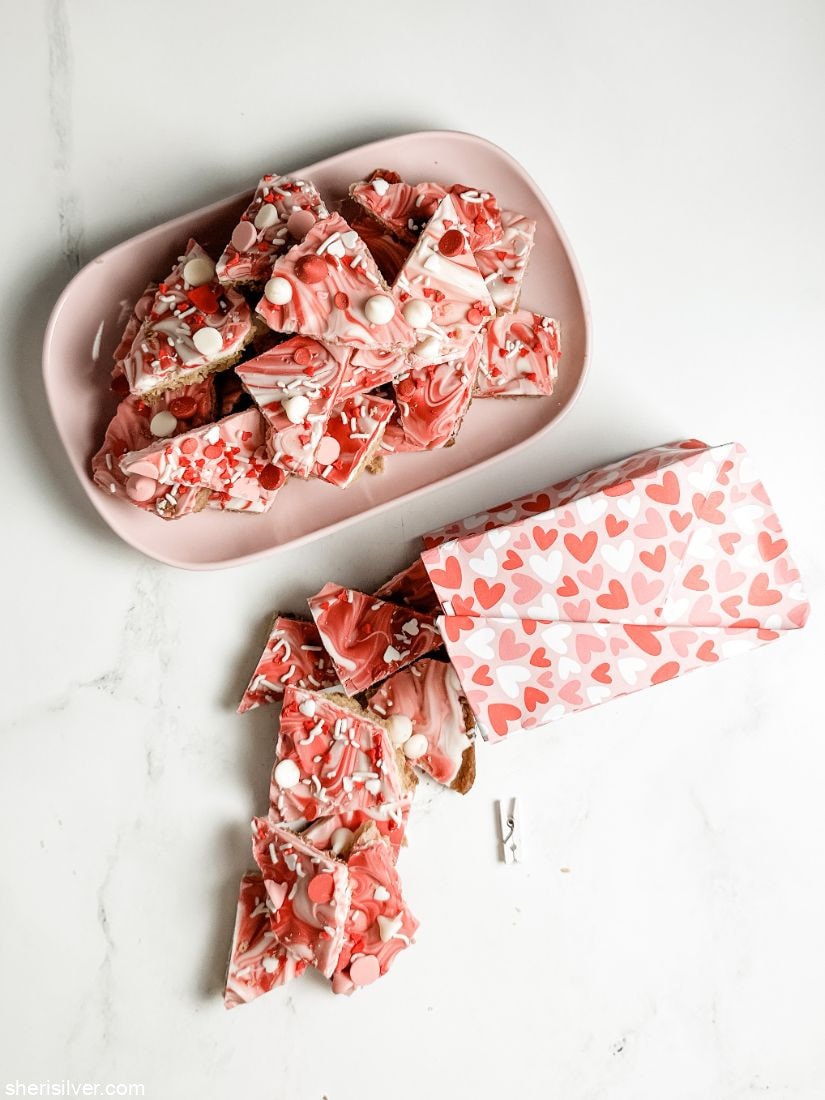
Now fill your bag! You can seal it with a binder clip, mini clothespin or washi tape. Add a gift tag or ribbon if you like and you’re ready to go!
Let me know if you try this DIY!
How to Make a Paper Gift Bag!
Instructions
- Start with a square piece of paper - anywhere from 12" to 16" is a good size range to use.

- Fold the paper diagonally in both directions.
- With the printed side facing up, fold the paper from top to bottom and then side to side.

- Use your hands to lift the paper by the center horizontal folds - the paper should fold in on itself into a triangular shape. Press down the edges to smooth and flatten.

- Turn the triangle so the long edge is at the top. Fold the point at the bottom up about an inch or so.

- Fold the top right point over to the left, keeping the top edges aligned.

- Fold the left point over to the right.

- Take that left point and fold it back on itself.

- Flip the paper over and repeat on the other side.
- You'll now have two points sticking up at the top. Fold them inward and tuck into the pockets that are on the inside of the paper.
- Now unfold that small triangle at the bottom, gently stick your hand into the bag, and "pop" the triangle out, creating a flat bottom. Crease the edges around the bag to sturdy the shape.
- Now fill your bag! You can seal it with a binder clip, mini clothespin or washi tape. Add a gift tag or ribbon if you like.
Notes
Please note that this post contains affiliate links. As a Rewards Style influencer I earn a small commission from qualifying purchases – at no additional cost to you.


2 Comments
Leave a Comment

Hi! I'm Sheri!
Welcome to my little corner of the web where you’ll find easy, delicious recipes, the best kitchen hacks and simple tips for turning your home into a clean haven that is free of toxins. So glad you’re here!

Adorable and perfect for your beautiful valentine bark! Your instructions are perfect!
Thank you Annie! I was sweating those instructions so I’m so happy to hear that! xo