
Easy Holiday Sugar Cookies (3 No-Fuss Decorating Techniques!)
These easy holiday sugar cookies are designed for decorating — with three no-fuss techniques anyone can master!
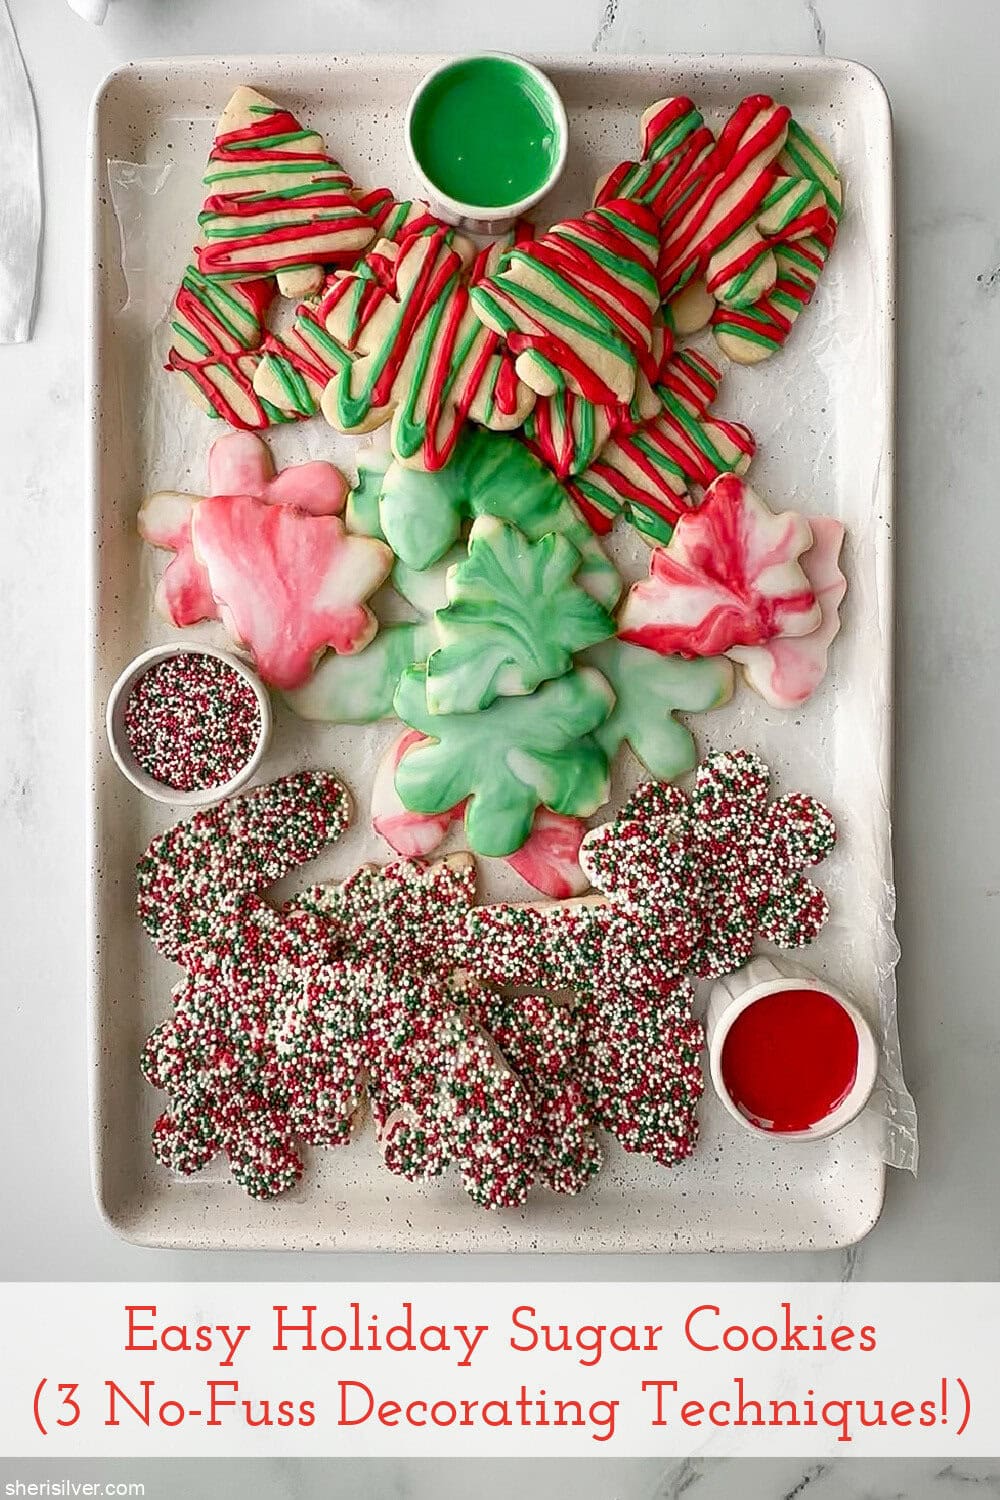
A few years ago the lovely folks at Wilton sent me the most incredible box filled with holiday baking tools, pans, and sprinkles. It arrived right around Thanksgiving—when I have a full house—so I baked a batch of simple sugar cookies, turned my dining room table into a decorating “workshop”, and let everyone dive in.

Best. Afternoon. Ever.
Watching the kids (from teens through 30-somethings!) completely lose themselves in decorating—without worrying about perfection—was a reminder of how FUN baking can be. And honestly? Freeing this Type A baker from the pressure of “Instagram-ready” results felt like my own little holiday miracle.
So when Elizabeth—my talented friend and co-partner in our “Sweet Treats for Your Sweet Tooth” series—suggested a holiday recipe for this month, I knew exactly where to turn for inspiration.
Because while I love beautiful, carefully executed baked goods, I also love techniques that anyone can master. Today I’m sharing:
- A foolproof sugar cookie recipe
- An easy, no-mixer icing
- Three super-simple decorating techniques
- Supplies you can find in any grocery store
Let’s do this!

Before You Begin
The icing recipe below makes enough to decorate the entire batch—whether you choose one technique or all three.
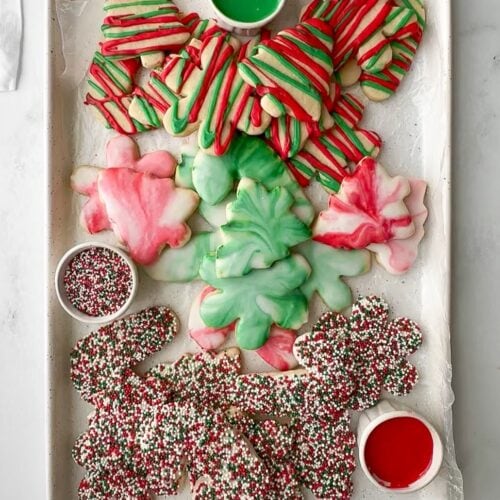
If you want to try all three (as shown in the video):
- Divide your cookies into three equal groups, and
- Follow the decorating techniques in the order listed (sprinkles → marbled → drizzled) for the most efficient workflow.
Each technique in the recipe card is written as a stand-alone method using the full batch of cookies and the full batch of icing. Choose your favorite—or rotate through all three!
Helpful Tips
These make the process easier and smoother (and hopefully more fun!):
- Feel free to use refrigerated cookie dough! Just roll and cut as instructed.
- Flavor your icing if you like—any extract works. (I usually skip it.)
- Roll the dough to at least ¼” thickness. Too thin = fragile cookies that can’t handle dunking and decorating. I swear by spacer bands for uniform rolling.
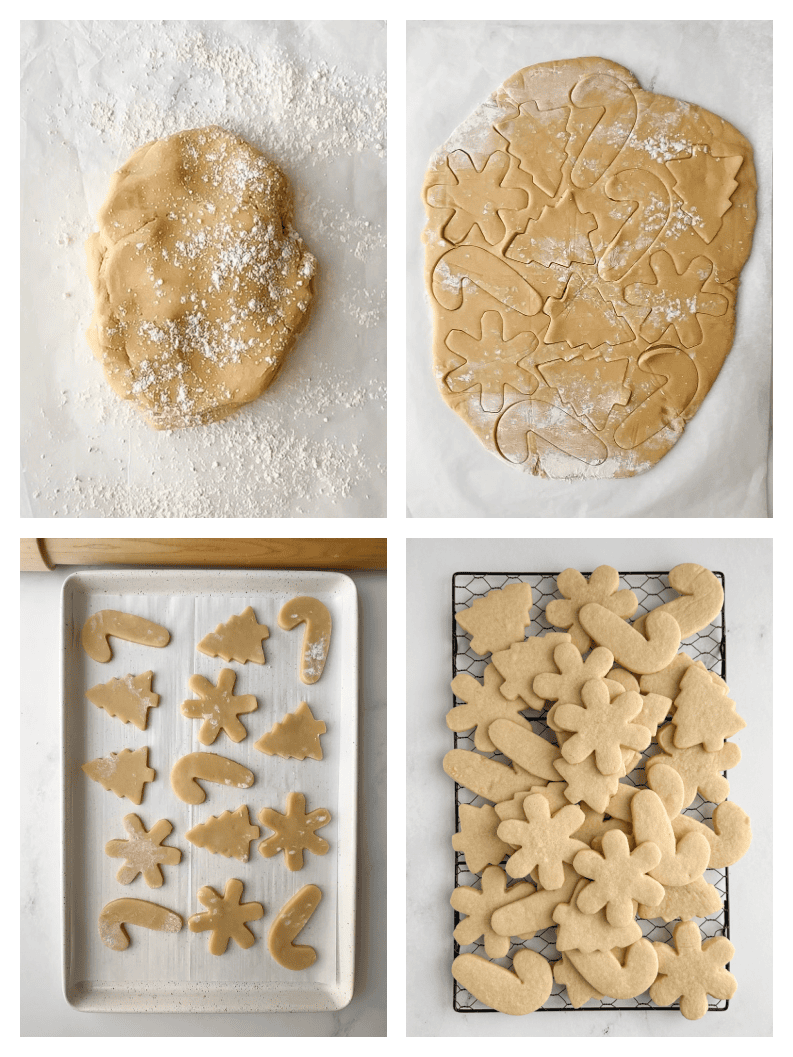
- Bake and freeze ahead! The unbaked cookies freeze beautifully. Thaw to room temperature before icing, or the glaze may seize.
- I used basic grocery-store food coloring for accessibility. Gel coloring gives richer hues and more variety of colors—use whichever you prefer.
- Choose simple shapes (trees, candy canes, snowflakes). They’re easiest to dip, swirl, and drizzle.
The Three Techniques
Below is the workflow you’ll follow if you want to use a single batch of icing to do all three (each technique is also in the recipe card as a stand-alone method).
Technique 1: Sprinkle Cookies
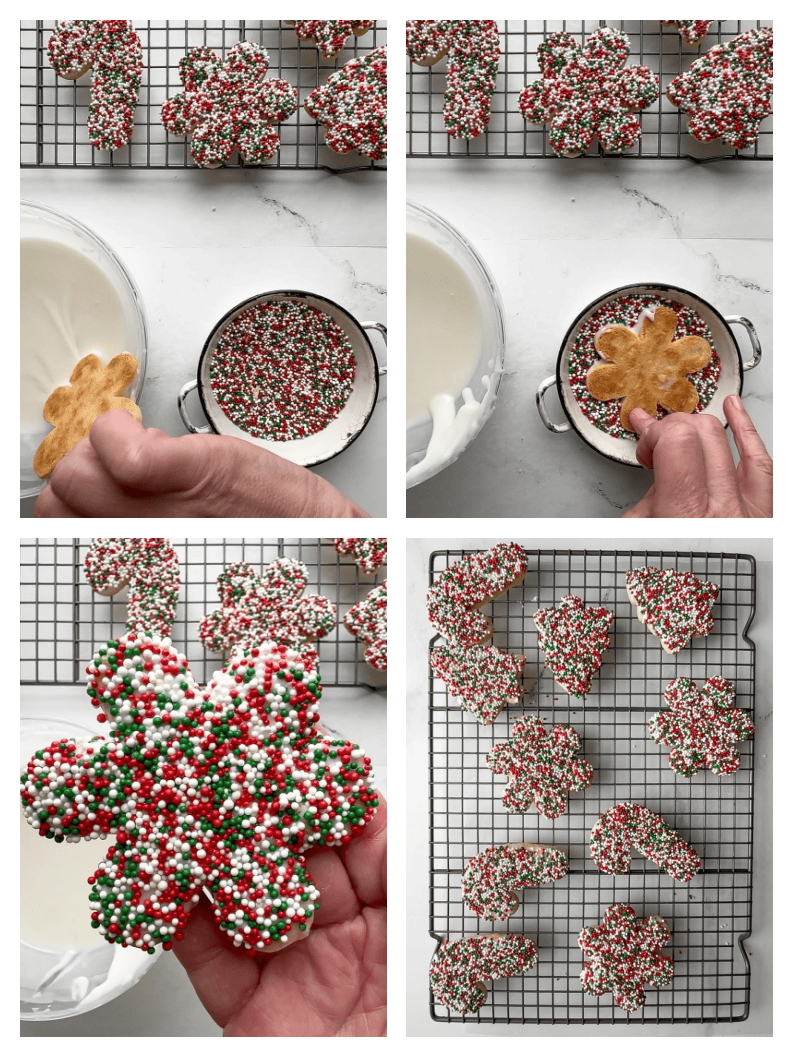
A perfect “warm-up”: quick, colorful, and the most forgiving.
- Set two wire racks over sheets of wax paper.
- Pour nonpareils into a shallow bowl.
- Icing consistency: thick but pourable (see video).
- Dip the tops of one third of your cookies into the icing, scrape lightly against the lip of the bowl (you only need a thin layer of icing), then dip into the nonpareils.
- Press gently for full coverage and place on the rack.

Technique 2: Marbled Cookies
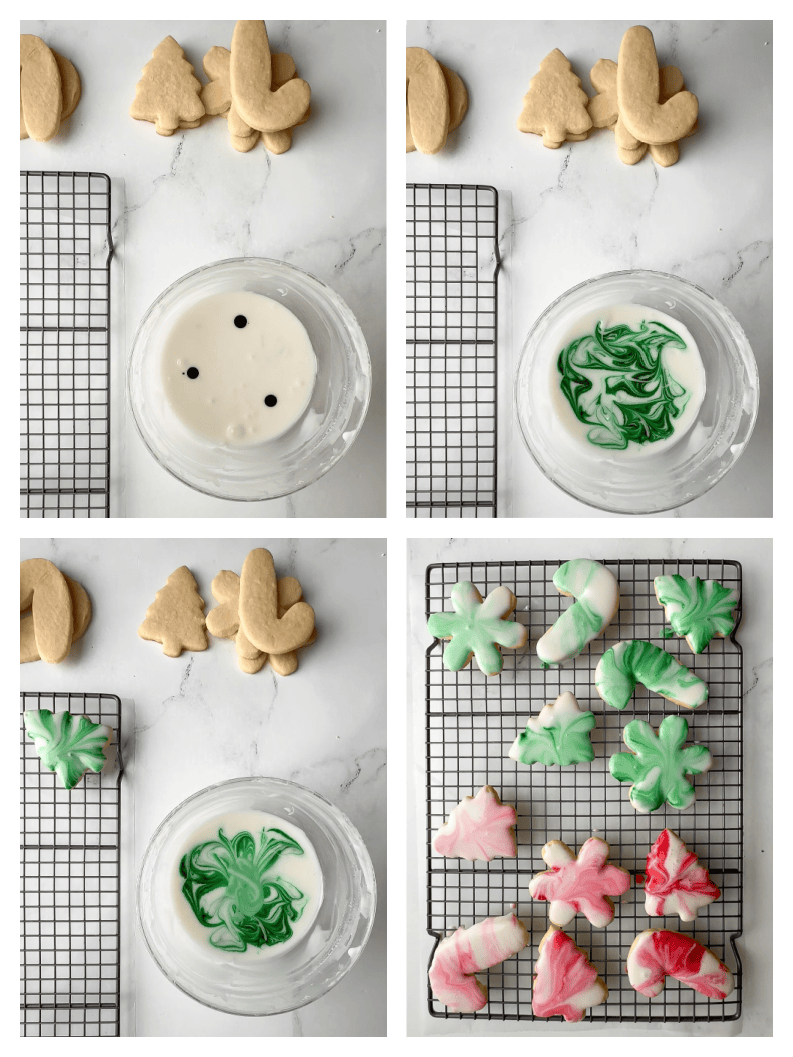
Minimal effort, maximum payoff, with pretty little swirls every time.
- Divide the remaining icing into two bowls (or make an extra half-batch).
- Tint one bowl with 2–3 drops of green food coloring; swirl lightly with a toothpick.
- Dip one half of the next third of cookies, lifting straight up and flipping over. Gently jiggle to let the icing settle.
- Repeat with red food coloring for the other half.

Technique 3: Drizzled Cookies

Festive, graphic, and foolproof.
- You should now have one bowl of red-ish and one bowl of green-ish icing.
- Add more food coloring to tint the icings deeper if you’d like, then add confectioner’s sugar until the consistency is thick and pipe-able.
- Transfer each color to a ziploc bag.
- Snip a tiny opening and drizzle one color over the final third of cookies.
- Repeat with the second color, filling in the gaps.

Let all cookies dry overnight before storing or serving.
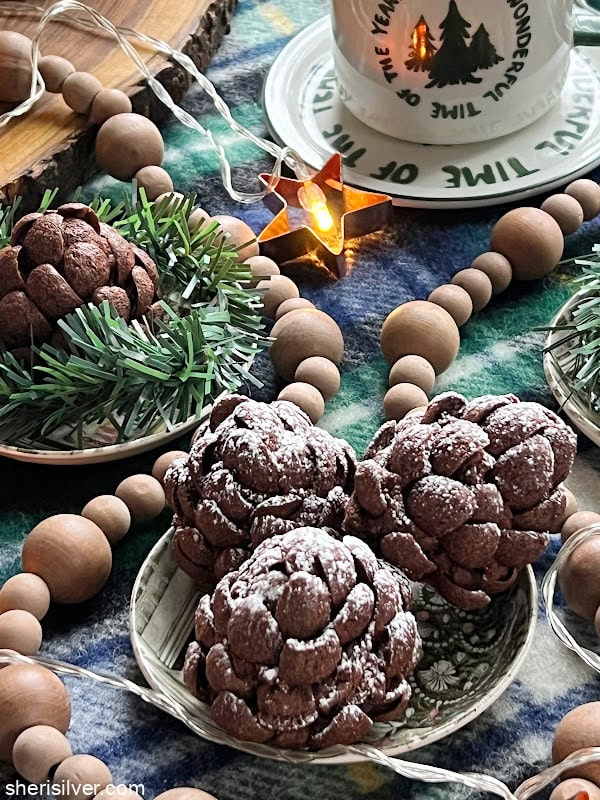
Let me know if you try this recipe, and be sure to check out Elizabeth’s absolutely beautiful pinecone brownies!
Easy Holiday Sugar Cookies!

Equipment
Ingredients
For the cookies:
- 1 cup 16 tablespoons unsalted butter, at room temperature
- 1 cup granulated sugar
- 1 large egg, at room temperature
- 1 teaspoon vanilla extract
- 3 cups all-purpose flour
- 1 teaspoon baking powder
- 1/2 teaspoon kosher salt
For the decorations:
- 2 cups confectioner’s sugar
- 2 – 4 tablespoons milk, water or lemon juice
- green and red liquid food coloring
- holiday sprinkles, nonpareils, decor
Instructions
- Cut 4 pieces of parchment paper to fit a standard size baking sheet (or have 4 pre-cut sheets at the ready).
- Beat the butter and sugar till light and fluffy. Add the egg and vanilla and beat again. Add the flour, baking powder and salt and beat once more.
- Divide the dough into thirds. Working with one portion at a time, roll to ¼-inch thickness between two sheets of parchment (dust parchment and dough lightly with flour if needed). Repeat with the remaining doughs. Stack the dough sheets on a baking sheet and refrigerate for at least 1 hour (for longer storage, freeze the sheets and wrap in plastic to prevent drying out).
- Preheat the oven to 350°F. Place one sheet of dough on a baking sheet. Remove the top sheet of parchment and set aside. Cut as many shapes as possible, removing the excess dough but leaving the cutouts on the parchment. Transfer the cookies to the baking sheet using a thin spatula, placing them in neat rows. Re-roll scraps and repeat. Bake for 8–10 minutes, or until lightly golden at the edges. Cool completely on a wire rack. Repeat with remaining dough.
- Decorating Technique #1: Sprinkle Cookies
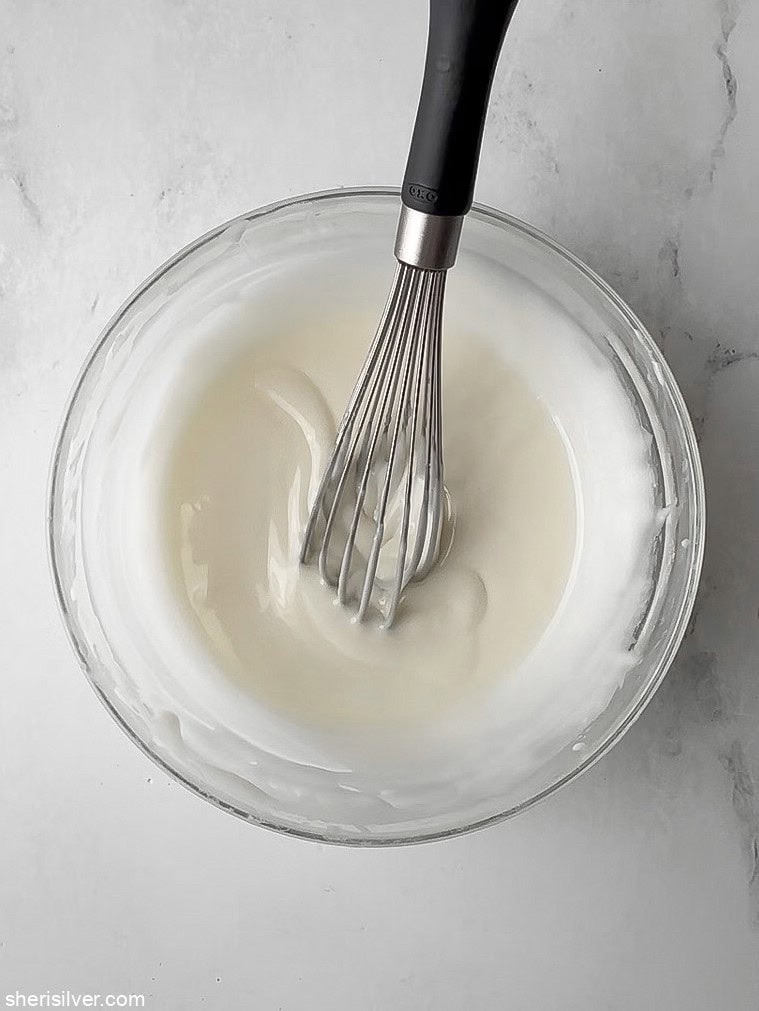
- Place the confectioner's sugar in a large bowl. Add 2 tablespoons of liquid and whisk. Add more liquid, a little at a time, until the icing is thick but pourable.
- Pour sprinkles/nonpareils into a shallow bowl. Set a wire rack over waxed paper.
- Working with one cookie at a time: Dip the top straight into the icing. Lift and gently scrape off the excess on the lip of the bowl (you only need a thin layer of icing). Immediately dip into the sprinkles, pressing gently for even coverage. Place on the rack and repeat with remaining cookies.
- Decorating Technique #2: Marbled Cookies
- Place the confectioner's sugar in a large bowl. Add 2 tablespoons of liquid and whisk. Add more liquid until the icing is thick yet pourable. Divide into 4 small bowls. Add a few drops of red food coloring to two bowls and green to the other two. Use a toothpick to gently swirl each color—just enough to marble without muddying. Set a wire rack over waxed paper.
- Working with one cookie at a time: Gently dip the top into the surface of the icing. Lift straight up and allow the excess to drip off. Flip right-side up and give a gentle jiggle to level. Place on the rack. When the colors start to muddy in one bowl, move on to the next.
- Decorating Technique #3: Drizzled Cookies
- Place the confectioner's sugar in a large bowl. Add 2 tablespoons of liquid and whisk. Add more liquid gradually until the icing is thick but still pipe-able. Transfer half of the icing to a second bowl and tint one bowl green and the other red. Set a wire rack over waxed paper.
- Spoon each color into a ziploc bag, pushing the icing into one corner and sealing. Snip a small opening in the corner and drizzle over the cookies in a zigzag motion. Let the cookies set completely before serving or storing.
Notes
- You can totally use refrigerated cookie dough—just roll and cut as instructed!
- Flavor the glaze if you like—any extract works (I usually skip it).
- Roll the cookies to at least ¼-inch thickness; thinner cookies will be too fragile for dipping and decorating. Spacer bands make this foolproof.
- These cookies freeze beautifully—whether undecorated or fully iced. To freeze unglazed cookies: cool completely, layer between sheets of parchment, and store in an airtight container for up to 2 months. Thaw at room temperature before decorating so that the glaze doesn't seize. To freeze decorated cookies: let the glaze dry fully, then layer between parchment and freeze the same way. Thaw completely at room temperature (still layered) before handling so the glaze doesn’t smudge.
- I used basic grocery-store food coloring to keep this project accessible. Gel colors are more vibrant—use whichever you prefer.
- Simple shapes (trees, candy canes, snowflakes) work best for dipping, swirling, and drizzling.

Frequently Asked Questions
Can I use store-bought cookie dough?
Absolutely. Refrigerated dough works beautifully—just roll and cut according to instructions.
Can I freeze the cookies ahead?
Yes! These cookies freeze beautifully—whether undecorated or fully iced.
To freeze unglazed cookies: cool completely, layer between sheets of parchment, and store in an airtight container for up to 2 months. Thaw at room temperature before decorating so that the glaze doesn’t seize.
To freeze decorated cookies: let the glaze dry fully, then layer between parchment and freeze the same way. Thaw completely at room temperature (still layered) before handling so the glaze doesn’t smudge.
What kind of food coloring should I use?
I used the basic grocery-store box for accessibility. Gel coloring is more vibrant—great if you want bolder color.
Can I flavor the icing?
Yes! Any extract works (almond, vanilla, peppermint). I usually skip it, but feel free to customize.
Why do my cookies break when dipping?
They’re likely rolled too thin. Aim for at least ¼” thickness—spacer bands make this foolproof.
What shapes work best?
Simple shapes like trees, candy canes, and snowflakes are easiest to dip and decorate.

Please note that this post contains affiliate links. As a Rewards Style influencer I earn a small commission from qualifying purchases – at no additional cost to you.




4 Comments
Leave a Comment

Hi! I'm Sheri!
Welcome to my little corner of the web where you’ll find easy, delicious recipes, the best kitchen hacks and simple tips for turning your home into a clean haven that is free of toxins. So glad you’re here!


Sheri,
Sugar cookies are my favorite holiday cookie! And decorating with friends and family makes them all the more special. My brother makes over 200 cookies each year and invites family and friends to decorate and then take home their creations. It is such a great holiday tradition.
I cannot wait to make these.
200 cookies?? Wow, now that is commitment!! What a lovely tradition! xo
The cookies look so delicious! I have to try making them.
Sugar cookies are my favorite, so I definitely have to try making them myself.