how to make a parchment paper cone!
In this step-by-step tutorial you’ll learn how to make a parchment cone!
parchment paper cones are perfect for small decorating tasks!
I love making paper cones, which I first learned this technique in a baking class I took years ago. We filled the cones with melted chocolate and piped fine dots and lines on our finished desserts. Once I got the hang of it, I found that they were quick and easy to make.

And while they don’t give me the precision or options of metal tips, they are a great choice for small decorating jobs!
a parchment pastry cone is perfect for smaller tasks!
While I am a big fan of disposable piping bags for frosting and decorating cakes and cupcakes I don’t need to waste them for smaller jobs – which is where parchment cones enter the picture!
what materials do you need to make a parchment paper piping cone?
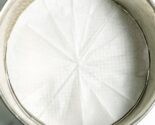
All you need is parchment paper (and a pair of scissors)! The size of your paper will be dictated by how much you’ll be filling. A square of about 24″ is good to start.
how do you make a parchment paper pastry bag?
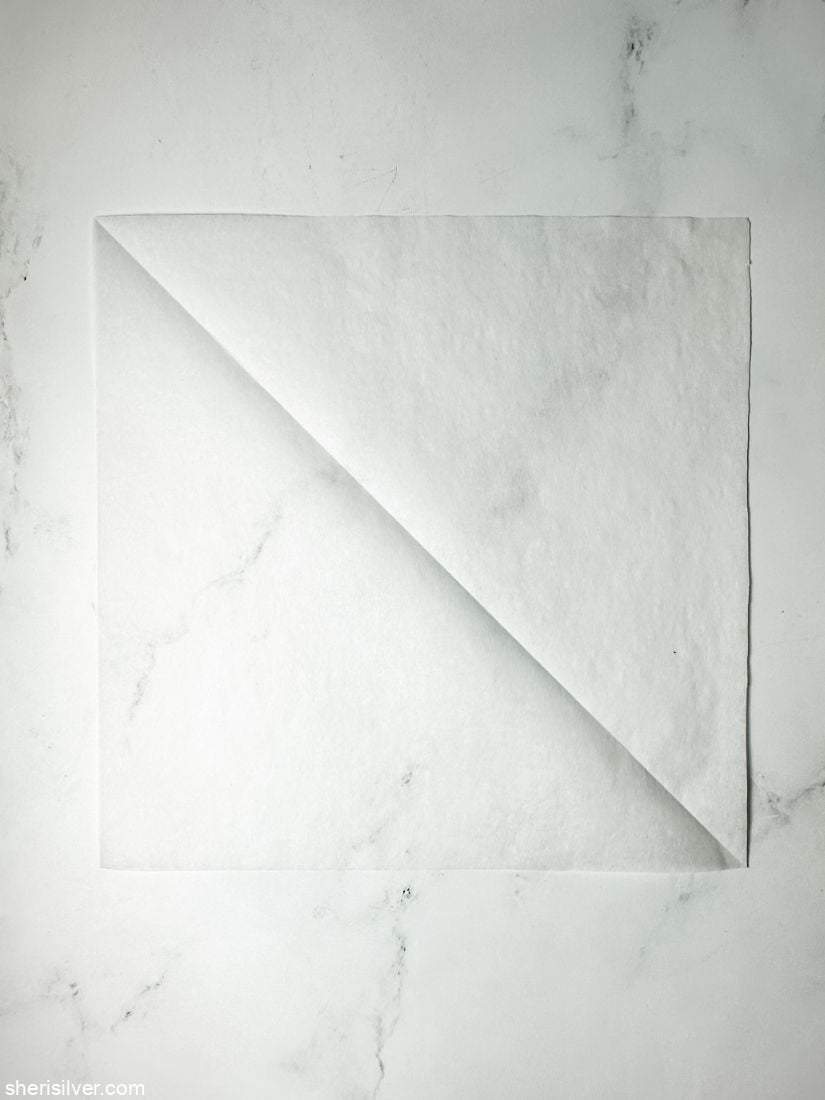
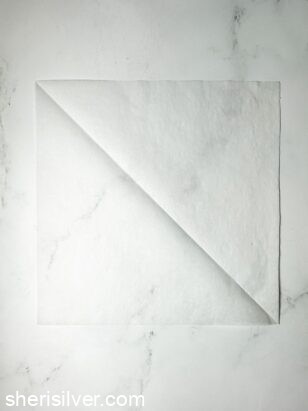
Start with a large square – about 24”. Fold it in half diagonally and cut the square into two triangles (you can save one of the triangles for another use).

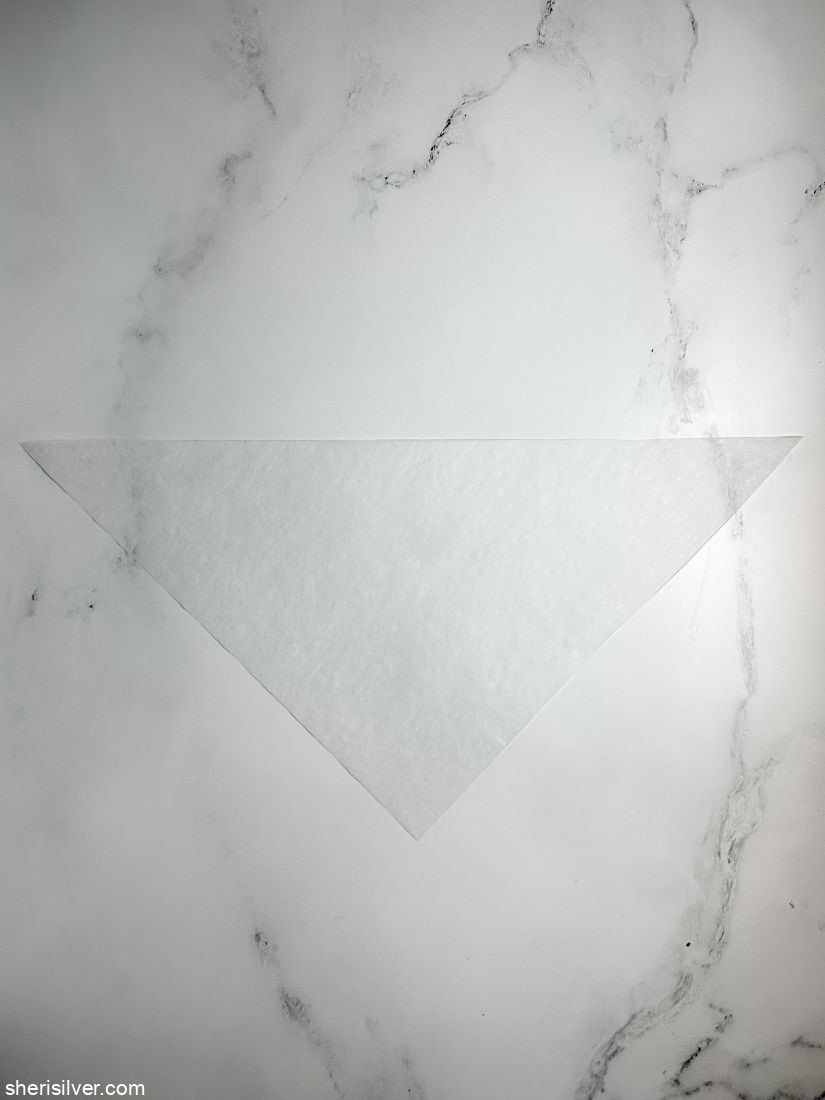
Position one triangle with the short point closest to you (and the longest side furthest away).
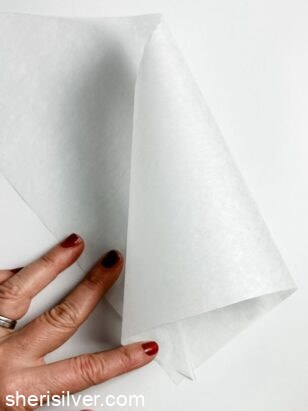
Take the right point and bring it down to meet the short point. Hold those points in place with your left hand.
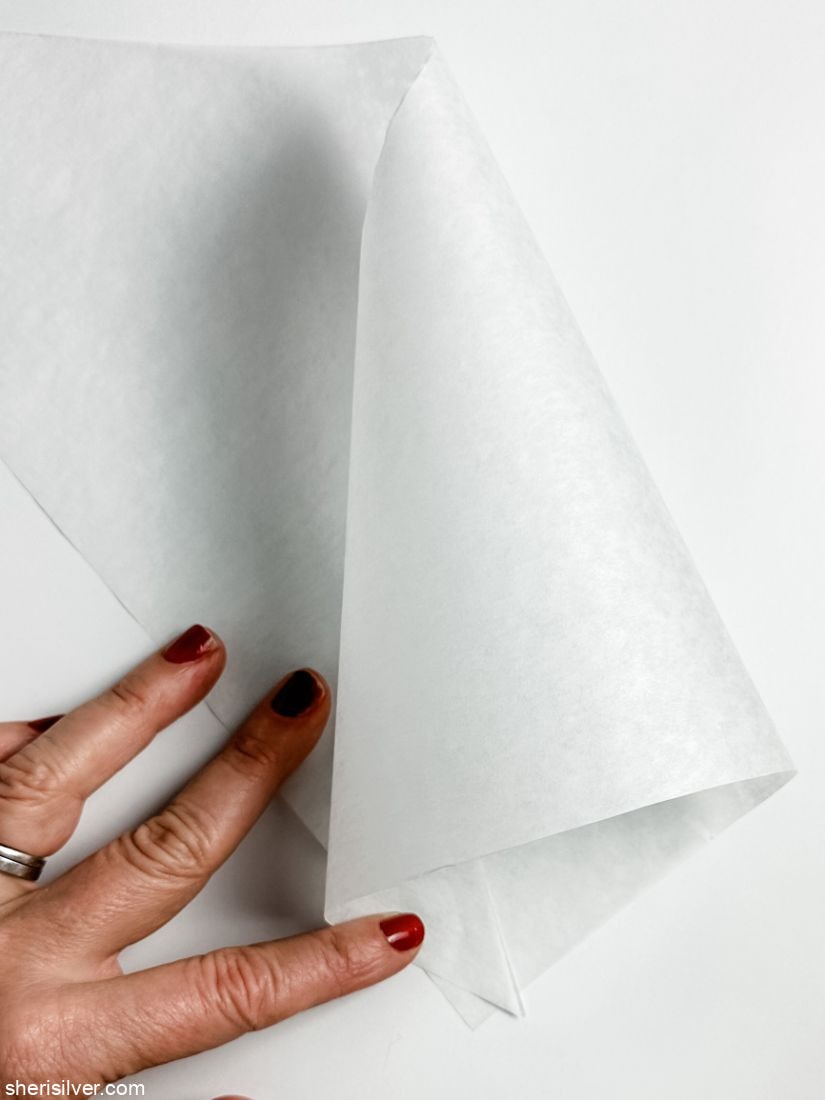
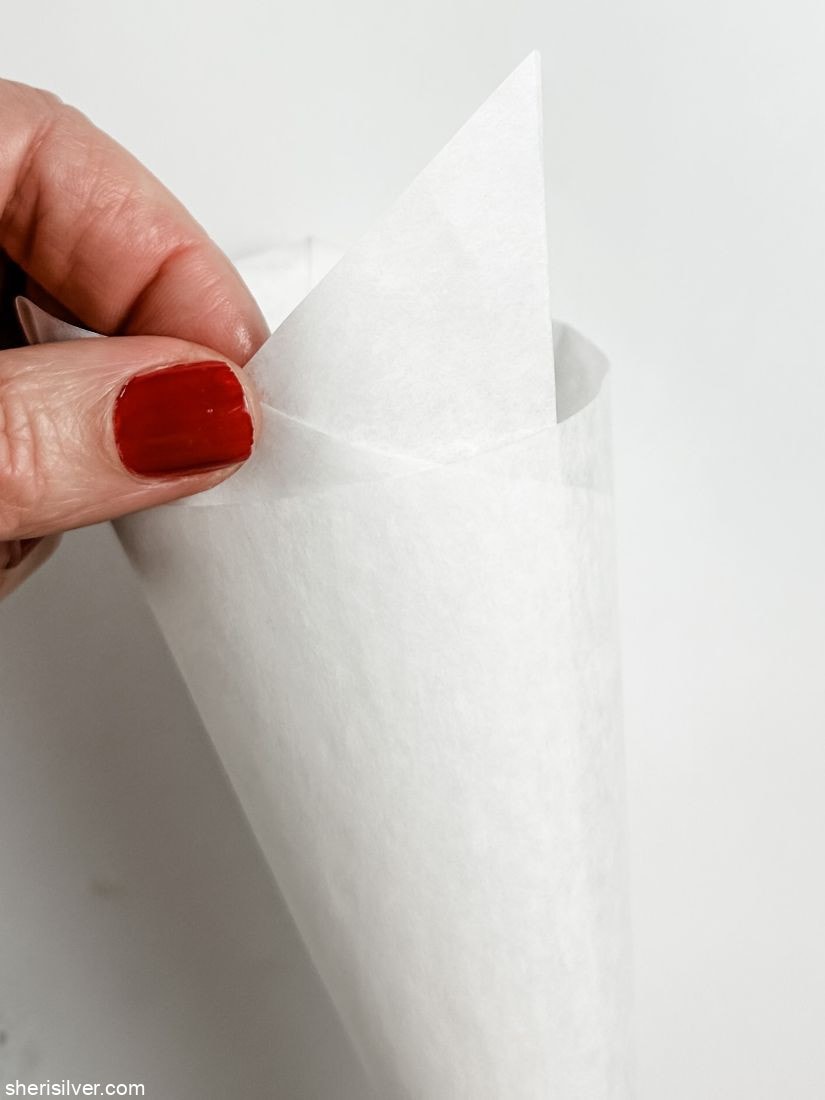
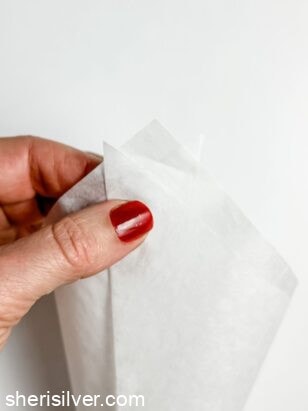
Now take the left point and, while lifting the paper, bring it around to meet the other two points at the top.
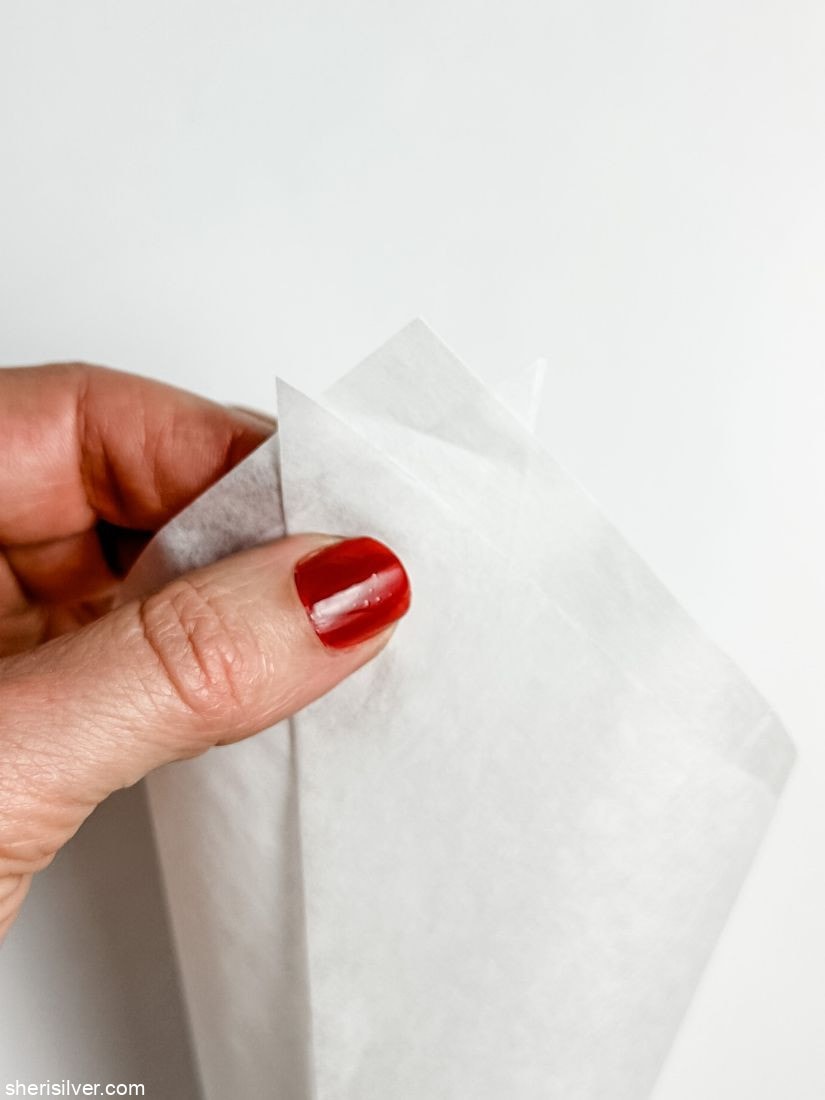
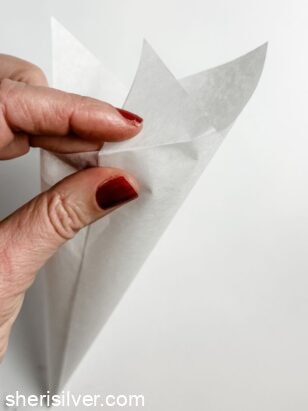
You should now have a cone. Pull up on that left point till the bottom of the cone is closed. Fold the three points inside or outside (depending on their position) to secure the cone and keep it from unraveling.
Outside point folded in:
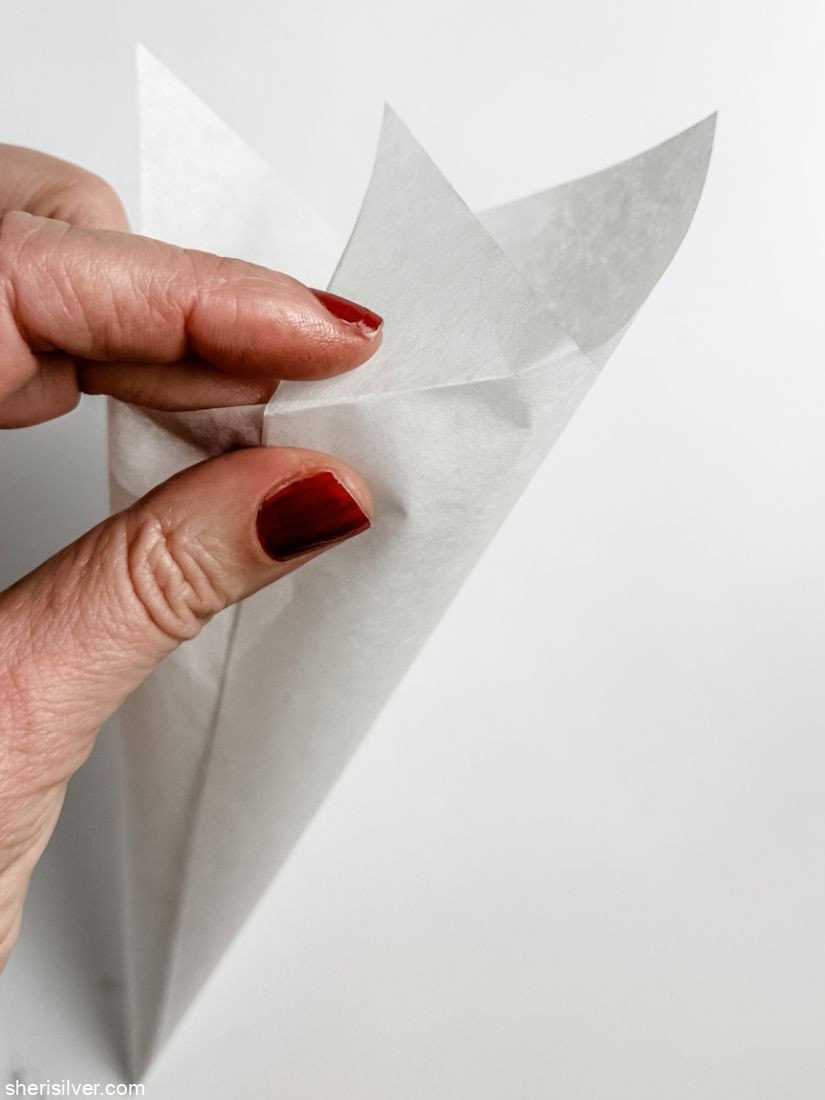
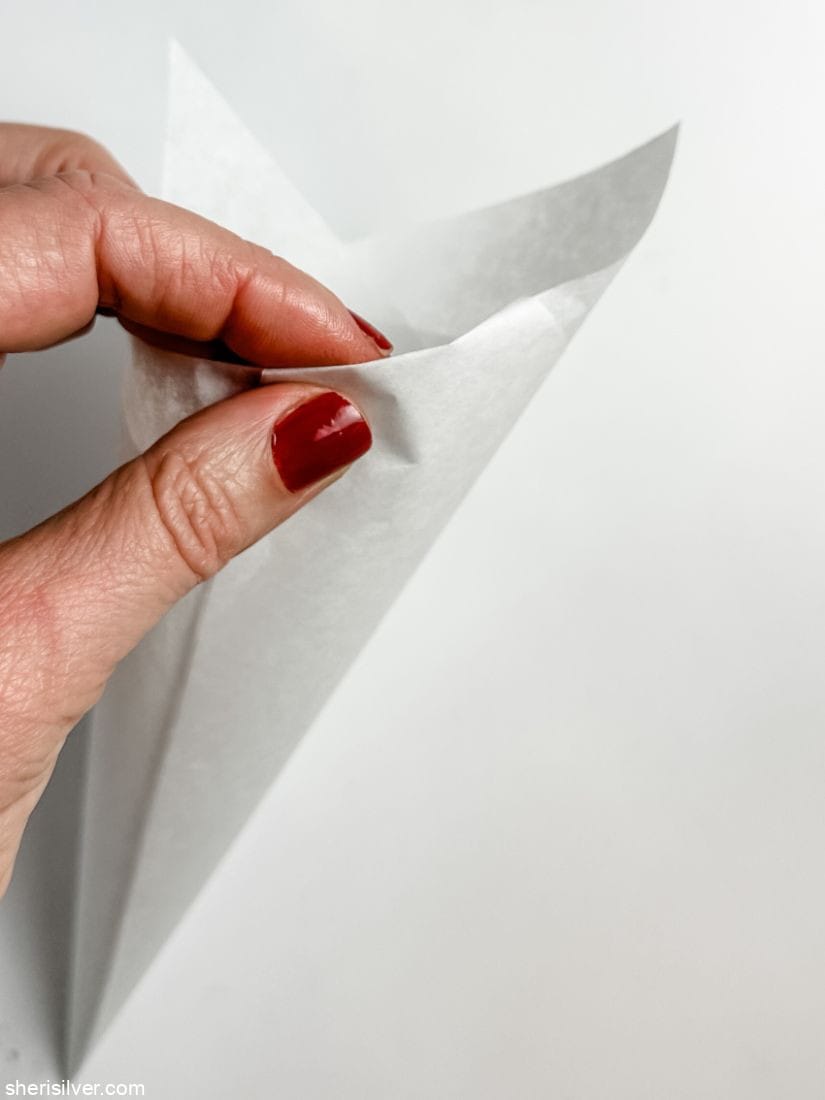
Inside point folded out:

Inside point folded out:
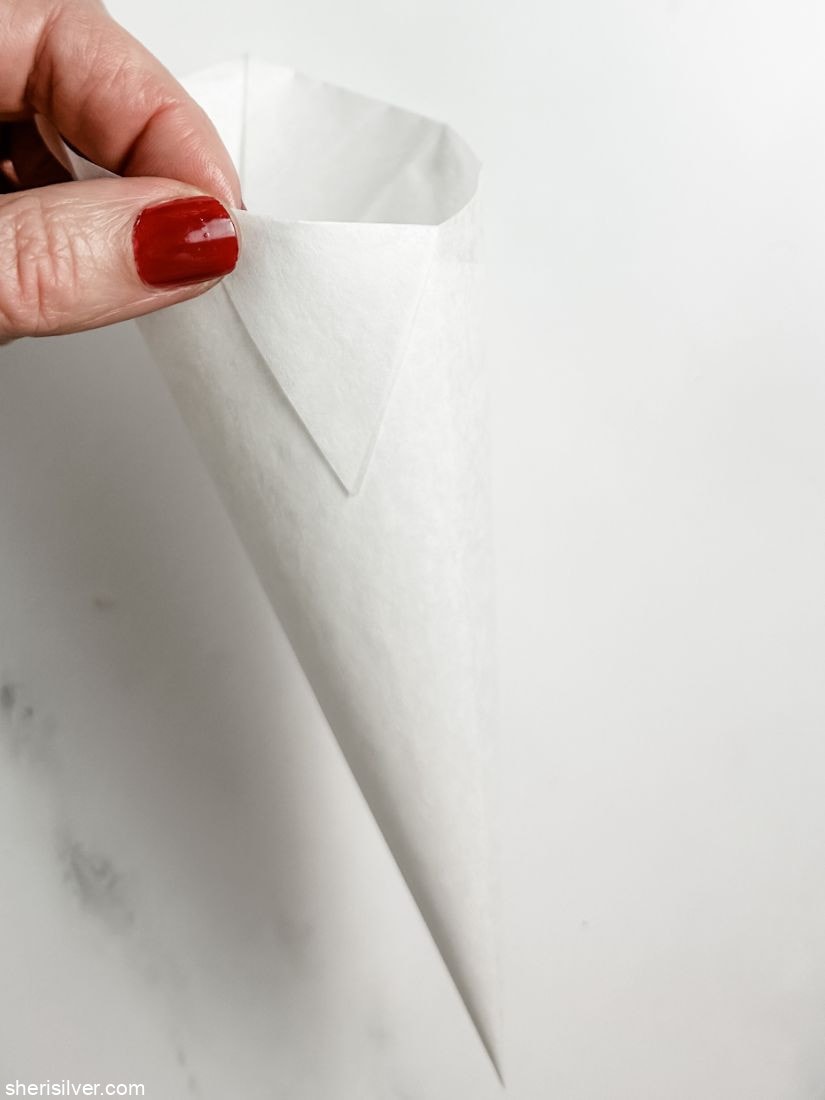
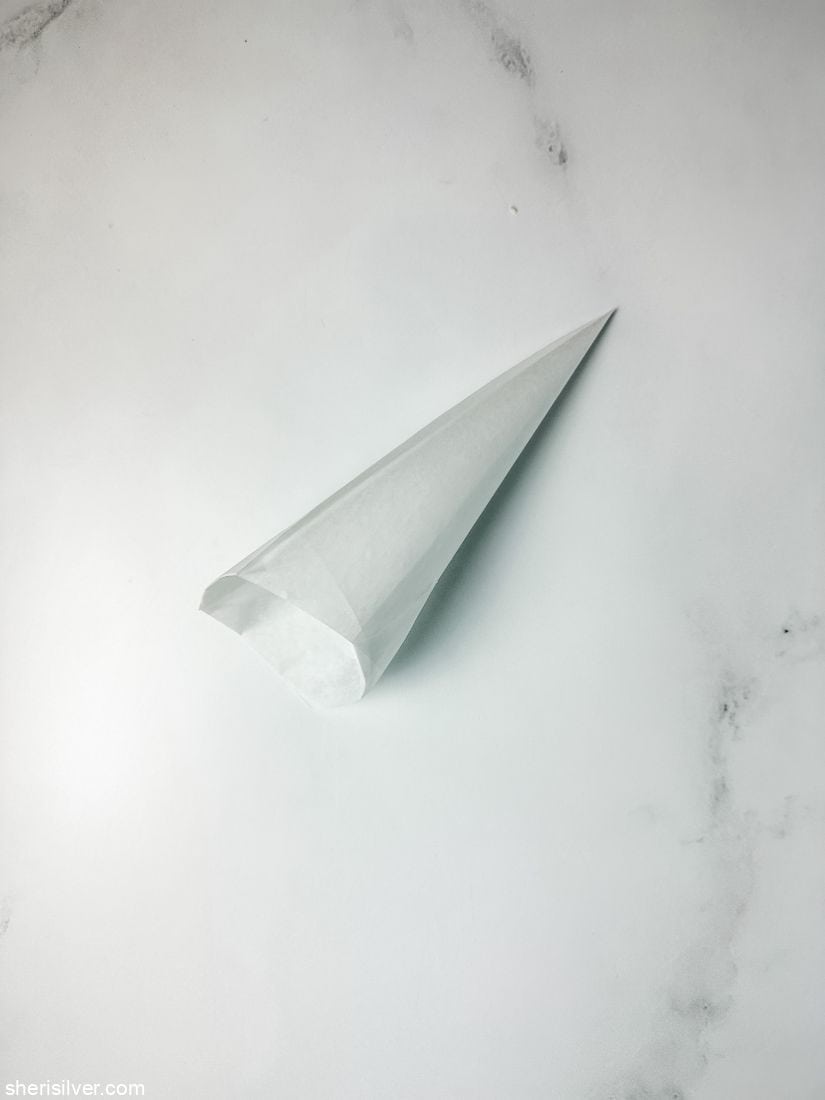
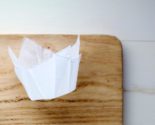
Now your cone is ready!
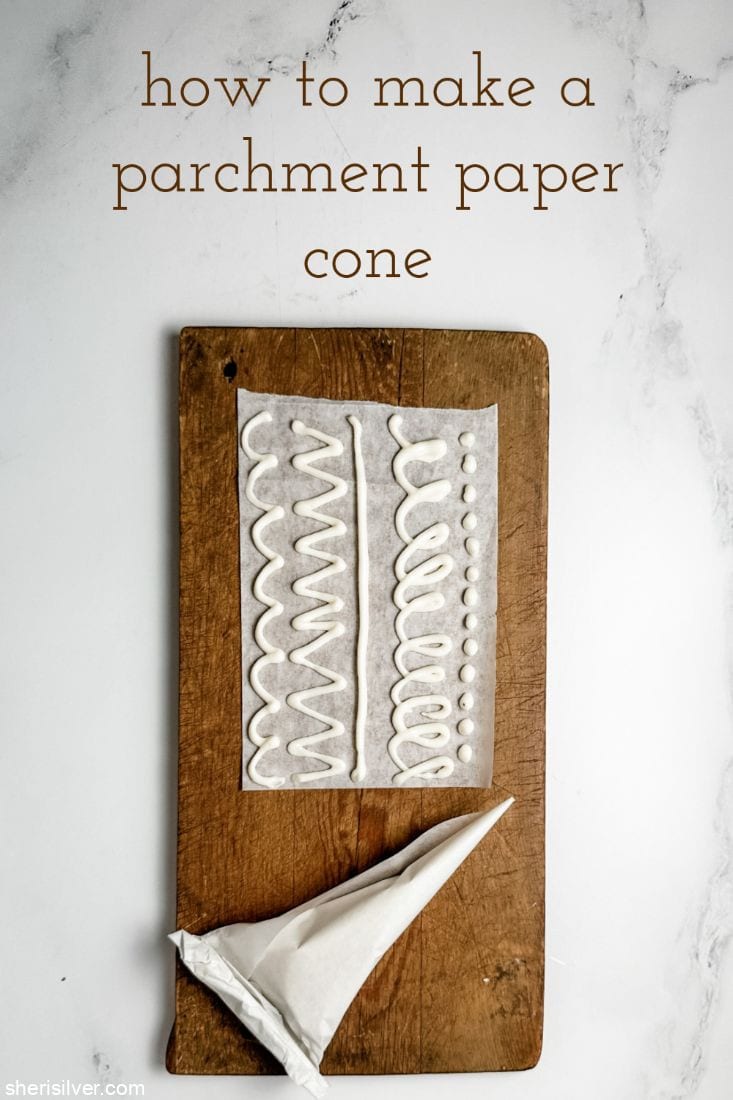
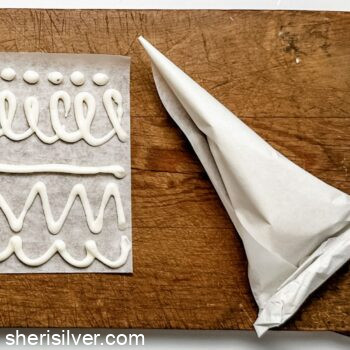
Place the cone in a glass and pour in your filling, leaving a few inches at the top. Roll the top closed to seal. Snip a small opening at the base of the cone – snip an opening smaller than you need; you can always go larger!
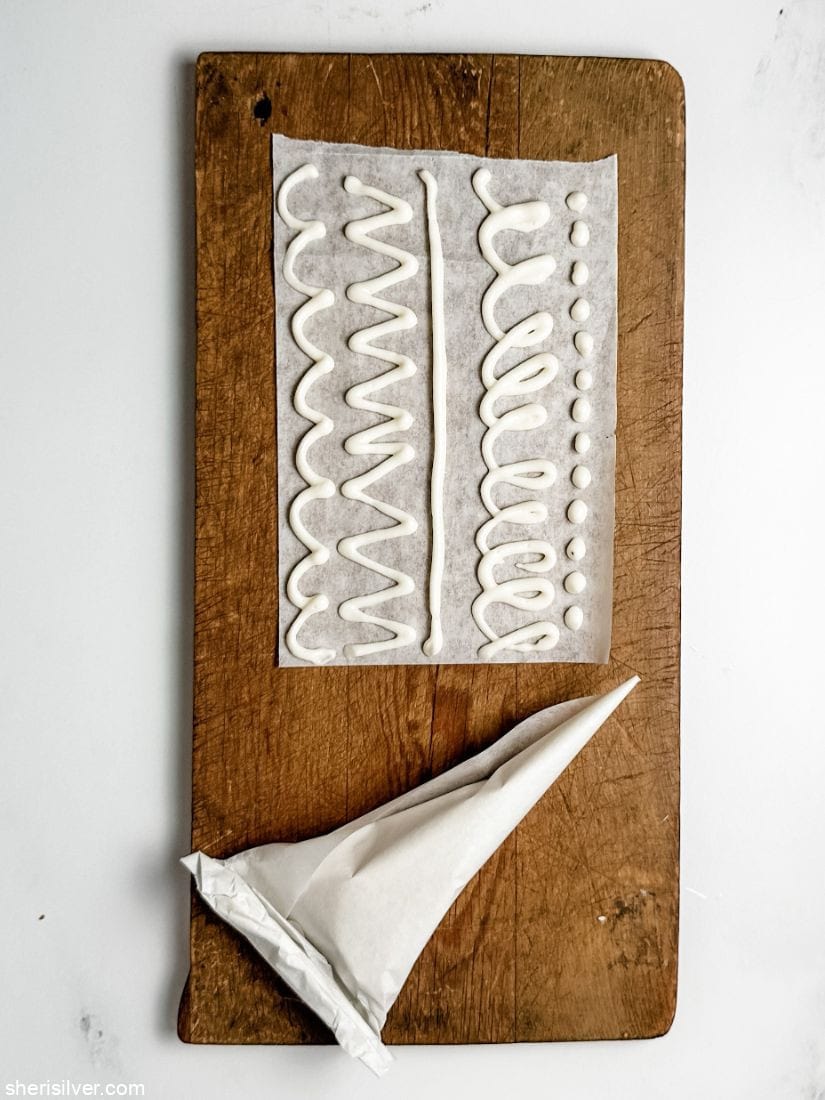
To use, pipe the filling out by rolling the top down (like you would a tube of toothpaste). You may want to practice on a cutting board or piece of waxed paper first.
And there you have it!
what can you fill the cone with?
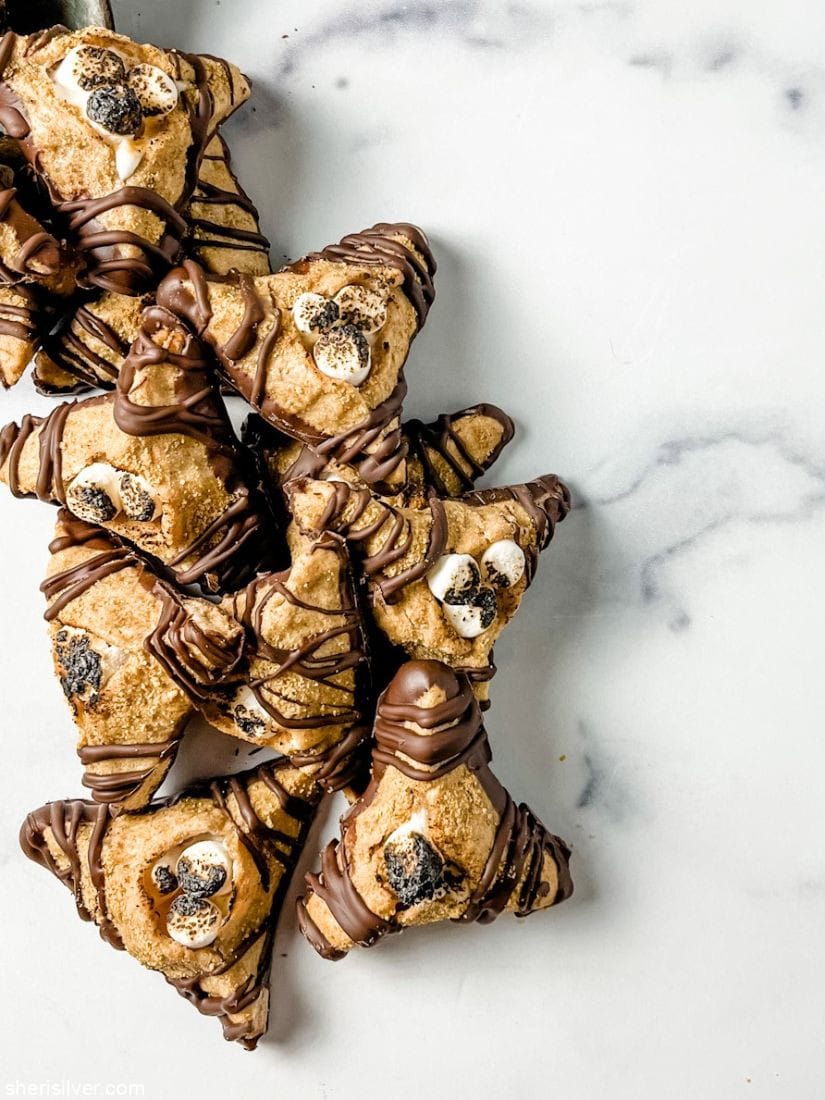
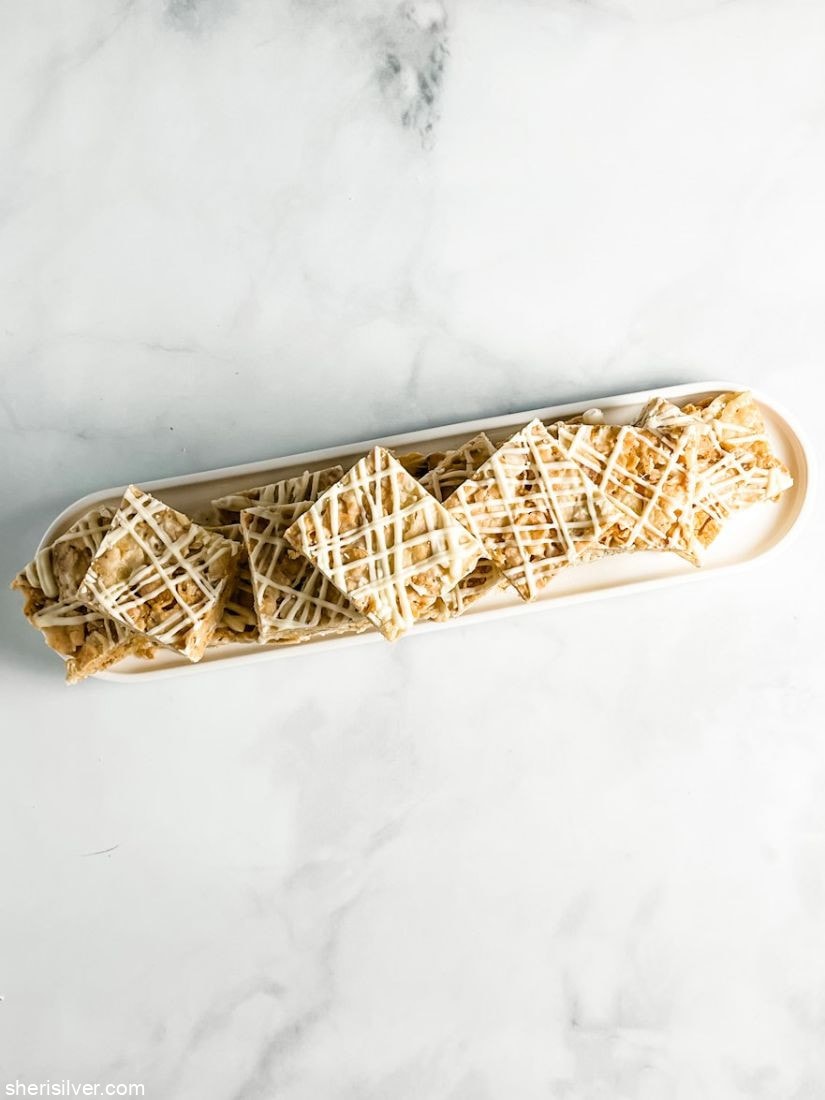
Literally any recipe you like! Royal icing, melted chocolate, cream cheese or buttercream frostings, dulce de leche – it all works beautifully!
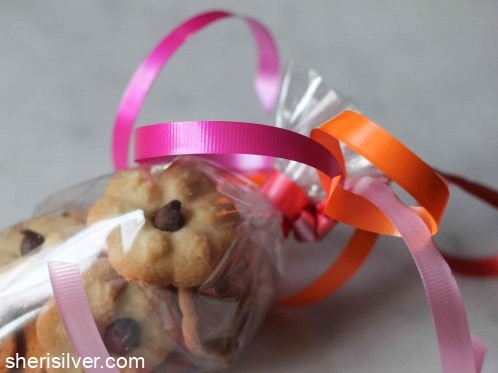
But don’t stop there – by simply switching the type of paper, you’ll discover lots of other ways to use these cones.
For example – cellophane paper cones are perfect for packaging a food gift. Fill them with a batch of homemade cookies or an assortment of jelly beans, tie it all up with a ribbon and you’ve got a pretty (and delicious) gift.
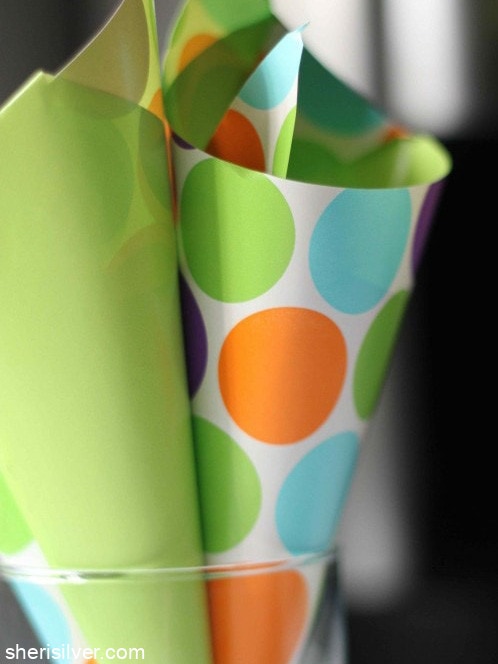
And how cute would these be filled with little candies or party favors? I used reversible gift wrap and alternated the sides.
Get ready to channel your inner pastry chef and let me know if you try it!
How to Make a Parchment Paper Cone!
Equipment
- scissors
Instructions
- Fold a large square of parchment paper in half diagonally and cut into two triangles (you can save one of the triangles for another use).
- Position one triangle with the short point closest to you (and the longest side furthest away). Take the right point and bring it down to meet the short point. Hold those points in place with your left hand.
- Now take the left point and, while lifting the paper, bring it around to meet the other two points at the top.
- You should now have a cone. Pull up on that left point till the bottom of the cone is closed. Fold the three points inside or outside (depending on their position) to secure the cone and keep it from unraveling.
- Place the cone in a glass and pour in your filling, leaving a few inches at the top. Roll the top closed to seal.
- Snip a small opening at the base of the cone - snip an opening smaller than you need; you can always go larger!
- To use, pipe the filling out by rolling the top down (like you would a tube of toothpaste). You may want to practice on a cutting board or piece of waxed paper first.
Please note that this post contains affiliate links. As a Rewards Style influencer I earn a small commission from qualifying purchases – at no additional cost to you.
4 Comments

Hi! I'm Sheri!
Welcome to my little corner of the web where you’ll find easy, delicious recipes, the best kitchen hacks and simple tips for turning your home into a clean haven that is free of toxins. So glad you’re here!

That is excellent. All your photos make the process so very easy to follow. I haven’t made paper cones before. I use piping bags with those metal nozzles on the end but I know a lot of chefs and cooks make their own cones.
Oh I’m so glad! For piping stars and other shapes and just more precision work in general, you can’t beat the metal tips. But the paper cones are quick (and disposable) if you’re doing simple decorating. Let me know if you make some! 🙂
Hi! Stopping by from our Blogging Buddies group on FB via the Sits 31BBB, and THIS is a fantastic idea. I’m getting into decorating my sweets and this is a perfect idea. I’m pinning it 🙂
Thank you SO much! I had a great week “meeting” many of you and look forward to expanding my circle! Thanks for writing!