this dried fruit garland is the easiest, prettiest decoration you’ll ever make!

I’m OBSESSED with this dried fruit garland!
Whenever I make candied citrus slices I always admire how pretty they are, and what a lovely decoration they’d make beyond just garnishing baked goods.
And this was the year to do it.
As I said, I’M OBSESSED.
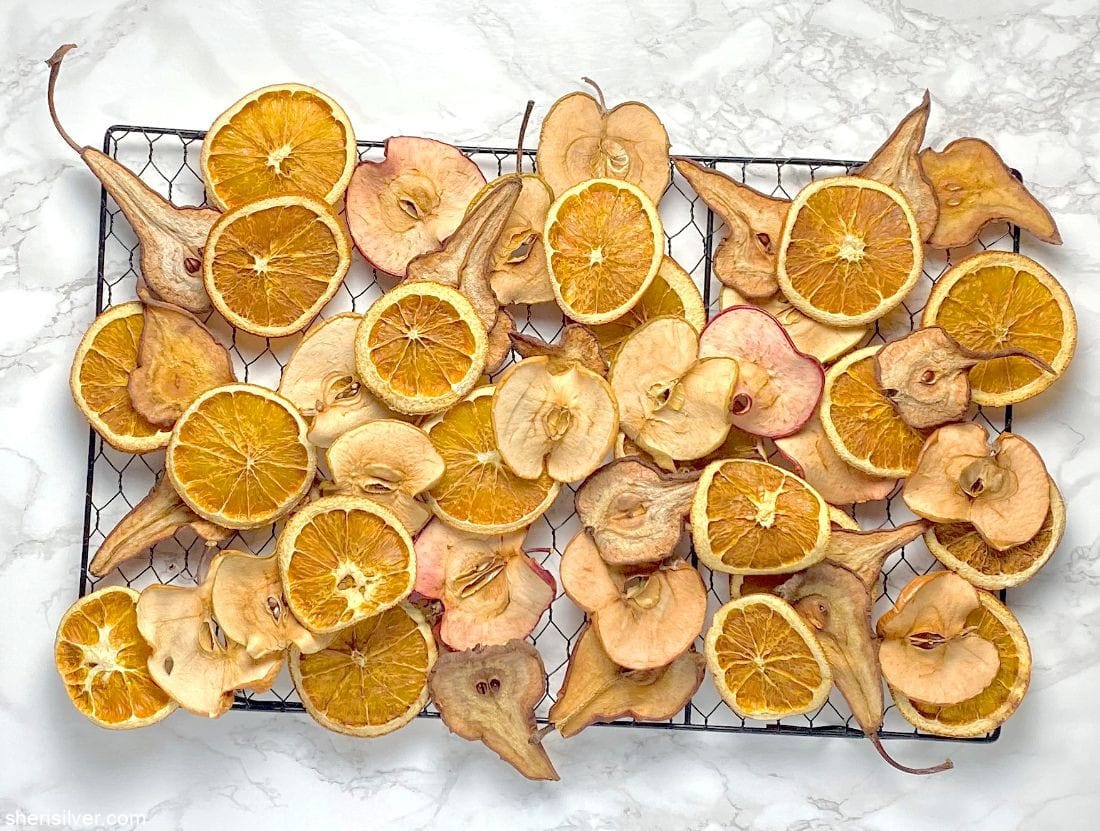
First of all, this could not be any easier to do. Simply slice up your fruits – I used a few different types of apples and pears and of course, oranges – and bake them in a low oven for a bajillion (okay, six) hours.


THAT’S. IT. You can use these beauties in so many different ways:

Ornaments.

Gift tags.

Potpourri (add some cinnamon sticks and a few drops of essential oil).
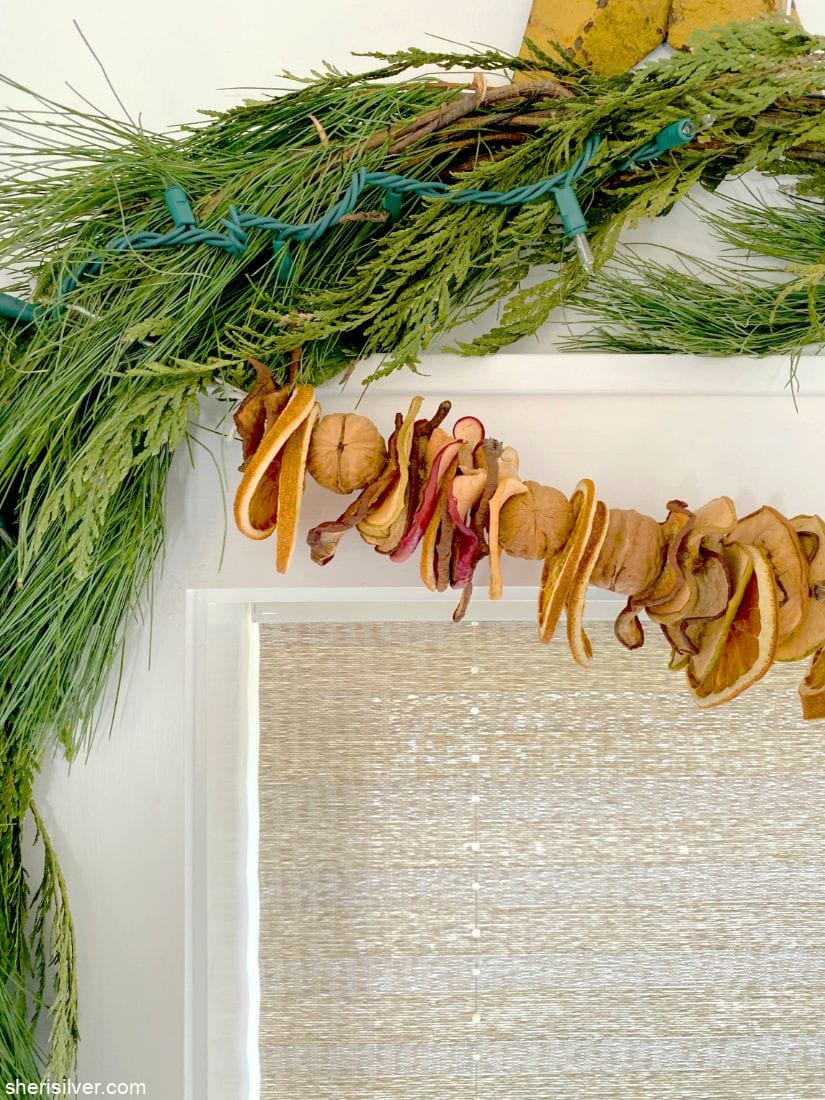
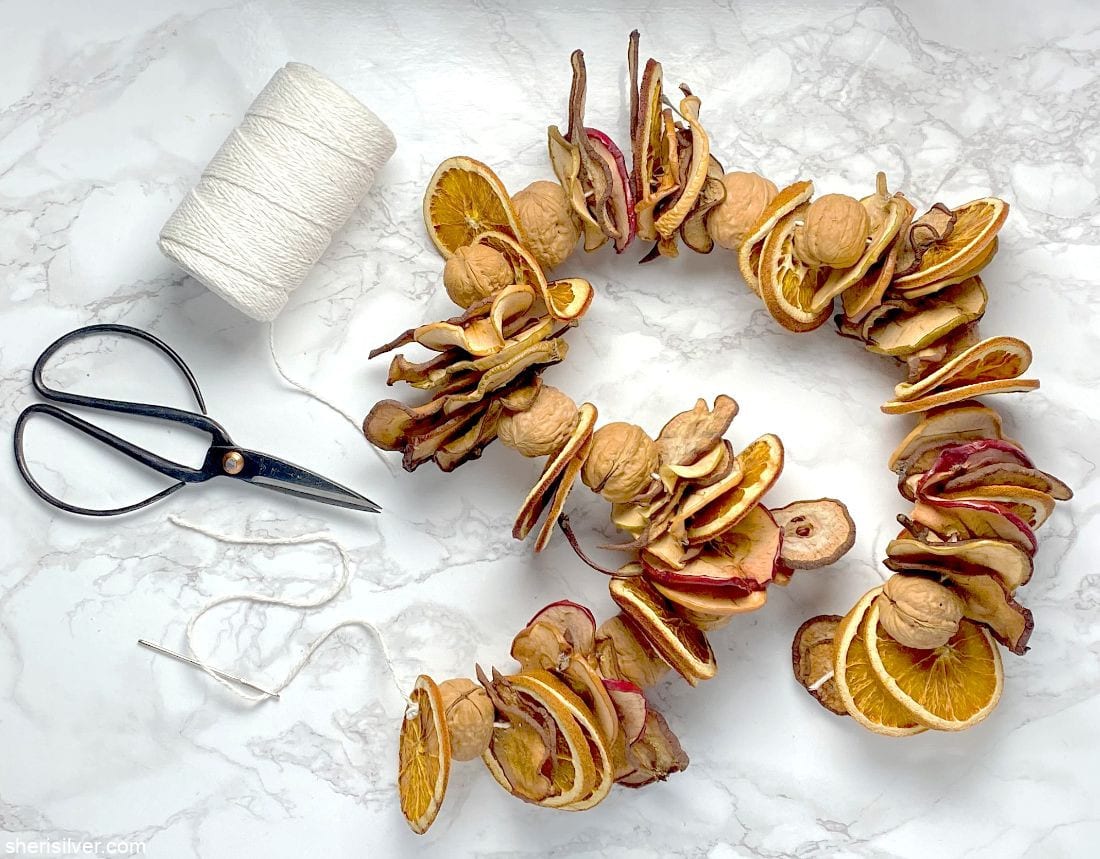
Or grab some cotton string and make this beautiful garland!

Mike was nice enough to drill holes in a few walnuts to fill it out, and next time I’d add a bunch of bay leaves too.
Isn’t it pretty?
SHOP THE POST!

assorted apples, pears and citrus fruits
heavy duty cotton string (if making a garland)
upholstery needle
whole walnuts, cinnamon sticks, bay leaves (optional)
Pre-heat the oven to its lowest setting – ideally 150 – 170 degrees. Slice your fruits to about 1/4″ thickness (do not peel) and place the prettiest slices on wire racks set over baking sheets (pro tip: blot the citrus slices with a paper towel, to absorb any excess moisture before baking).
Bake the fruit slices till they’re completely dried out. The time can vary based on your oven and the thickness/moisture content of your fruit; mine took about 6 hours.
Let them cool and use as desired!
This delicious recipe brought to you by Sheri Silver
https://sherisilver.com/2019/12/12/dried-fruit-garland/
Want more? Try these handmade DIYs:
Related posts:


Hi! I'm Sheri!
Welcome to my little corner of the web where you’ll find easy, delicious recipes, the best kitchen hacks and simple tips for turning your home into a clean haven that is free of toxins. So glad you’re here!
