When giving a gift to someone – for a birthday, holiday or just to say “thank you” – I love nothing more than when that gift is something I’ve made or assembled myself. There is just something about giving someone a gift that you’ve created with your own two hands that – even with its imperfections and homemade looks – conveys a level of love and care that no store-bought item can replicate.
Sometimes it’s flowers cut from my garden. Other times it’s a photo album. And then there’s my occasional foray into a “craft” (albeit a simple one, for sure).
But MOST of the time it’s food. Whether a dinner, box of assorted cookies or tray of muffins, giving an edible treat is my favorite way to express my love and appreciation for the special people in my life. And there are no greater “specials” than my family.

Here’s the quickest, easiest most foolproof homemade bread that you will ever bake. Chelsea often seems to subsist on nothing but avocado toast, and nothing makes me sadder than when she has it on some sub-par packaged sliced bread – or worse, a dry, bland rice cake or cracker.
If you think that true homemade bread is either super complicated or beyond the reach of the novice home cook, I am here to prove you wrong.
This is one of those recipes where less is more. A quick stir, followed by a long rest.

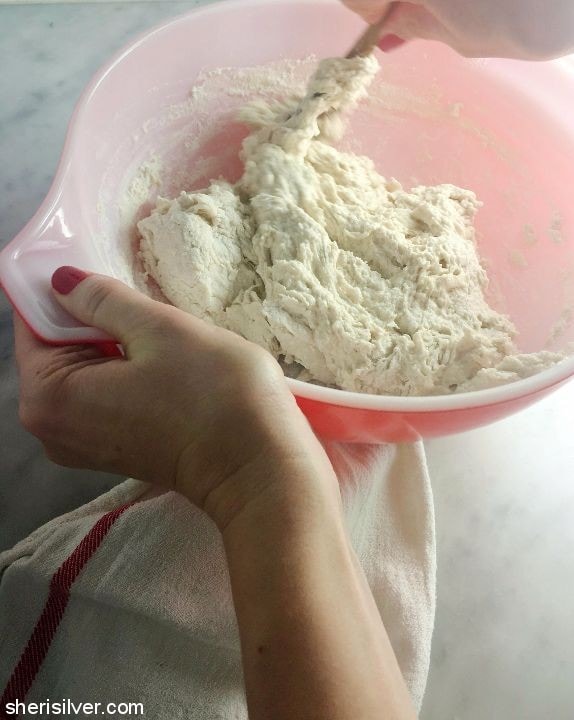

A quick fold or two, followed by another (less-long) rest. And a toss in the oven.

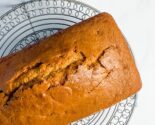
The bread makes the most delightful crackling sounds as it cools, and you will not believe your eyes when you slice it open and see what you’ve created.

With your own two hands.

lightly adapted from The New York Times
3 cups bread flour (all-purpose is fine)
1/4 teaspoon instant yeast (also known as rapid rise)
1 1/4 teaspoons salt
1 1/2 cups room temperature water (don’t worry about the temp; a little cooler or a little warmer is fine)
Place the dry ingredients in a large bowl and give a quick stir. Add the water and stir till just combined. The dough will look “shaggy”; avoid the urge to over mix. Cover with plastic wrap and let sit anywhere from 12 to 24 hours. The dough will be ready when it has risen and is covered with bubbles.
Place a lidded, heatproof pot (I used a 5-quart Dutch oven here) in your oven and turn the temperature to 450 degrees. Cut a piece of parchment paper long enough to fit into your pot so that you can use it as a “sling” to easily transfer the dough. Place the paper onto a work surface and dust it with flour. Turn the dough out onto the paper and sprinkle the top with a little more flour. Gently but quickly fold the dough over on itself a few times (floured hands help with this process), till you have a nice, smooth mound. This should take about a minute.
Fold the parchment paper over the dough and then cover with a dish towel or plastic wrap and let sit for 30 minutes (note: after 20 minutes you can make slash marks in the top of the dough – I like the way this makes the loaf look, and I believe it helps give a nicer rise in the oven).
After 30 minutes carefully remove your pot from the oven and – using the parchment paper – transfer the dough into the pot. Cover and return to the oven and bake for 30 minutes. Remove the lid and bake for another 15 – 20 minutes, till you have a deep, golden brown crust. Use your parchment paper to transfer the bread to a wire rack to cool completely. This delicious recipe brought to you by Sheri Silver
https://sherisilver.com/2017/06/15/d-i-y-no-knead-bread/

Related posts:


20 Comments
Leave a Comment

Hi! I'm Sheri!
Welcome to my little corner of the web where you’ll find easy, delicious recipes, the best kitchen hacks and simple tips for turning your home into a clean haven that is free of toxins. So glad you’re here!

Oh my goodness, this bread looks so fluffy but crunchy. yum. I can’t believe how easy it seems to be! {client}
It really is as easy as it looks! 🙂
Can I use another flour besides bread flour, like wheat, or a grain of some kind?
I never have but from everything I’ve read, this recipe will work with any type of flour! Let me know if you try it; I’ll put the notes in the recipe! 🙂
I’ve made it with 2/3 wheat and it turns out great
Thanks for sharing this! 🙂
You’re welcome…BTW, we all LOVE this bread.
I tried it with all purpose gluten-free flour that is supposed to be able to substitute for wheat all purpose. It came out at hard as a rock! I followed the recipe exactly. My dough did not rise like your photos. Are you sure the 1/4 t yeast is correct? And, no sugar?
The 1/4 teaspoon is correct – this recipe relies on a very long rise time in place of the usual larger amount of yeast. That said, I don’t think it’s enough yeast to give the proper rise to a GF flour blend. Here’s a link that you might want to try – you can see how much more yeast is used than here! https://www.glutenfreeandmore.com/recipes/Gluten-Free-No-Knead-Bread-4875-1.html
This was easily the easiest no-knead bread I’ve ever made. And tasty? VERY!
Thanks so much for the recipe. I’ve passed it on to two others (by request)!
Genius, right? I sometimes wish it wasn’t so easy! 😉 Thank you for writing!
Genius? YES! It takes less ‘active time’ than running to the store, and it tastes FAR better, too!
Today’s bread: https://scontent.fapa1-1.fna.fbcdn.net/v/t1.0-9/49790917_10161230157435335_1577389110971072512_n.jpg?_nc_cat=110&_nc_ht=scontent.fapa1-1.fna&oh=80f317eeff65dece7c1841d62e20ea22&oe=5CBE24CF
WOW! Beautiful!
in the process of making this! ;o)
Oh great! Let me know how it turns out!
Yay, Melina!
Largely due to you! Thanks, Sheri!
First one failed but I am going to keep trying. I think my starter was not growing. It might need more feeding and TLC.
Ugh – don’t give up!