
Oh yes I did.
Samoas were tops on my “D.I.Y.” list – I freaking LOVE Samoas.
I always associate this time of year with Girl Scout cookies, so it seemed fitting to make them now.
Are you a Samoas fan? I always feel like I’m in the minority, totally outnumbered by team “Thin Mints”. But – eww – chocolate and mint? No thank you. I’m a Samoas girl through and through, and I was so excited to try these bad boys for myself!
And all I have to say is – Oh. My. God. What a royal pain they were to make.
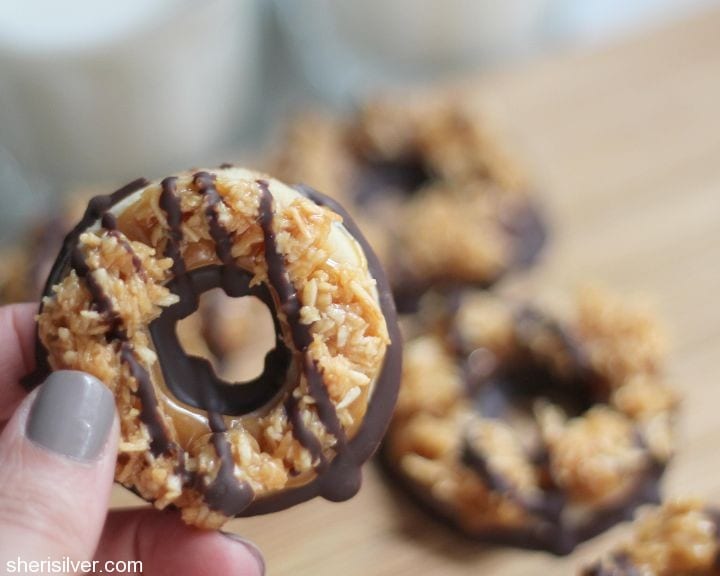
Were they worth it? Totally.
Would I make them again?
Probably not.
Good thing that this recipe yielded plenty – so I’ve got a nice stash in the freezer.


And no end of Girl Scouts in my hood.
Have you ever made your own Samoas?
baking tips and tricks
on weighing ingredients
adapted from Instructables
Shortbread Cookies:
1 c. (2 sticks) unsalted butter, at room temperature
1/2 c. (100 g.) sugar
2 c. (10 oz.) all-purpose flour
1/4 t. baking powder
1/2 t. salt
2 T. milk
1/2 t. vanilla extract
Topping:
3 c. (8 0z.) shredded unsweetened coconut (see Notes)
(2) 14-15 oz. bags soft caramels (see Notes)
6 T. milk
1/2 t. salt
12 oz. dark or semi-sweet chocolate, chopped (or chips)
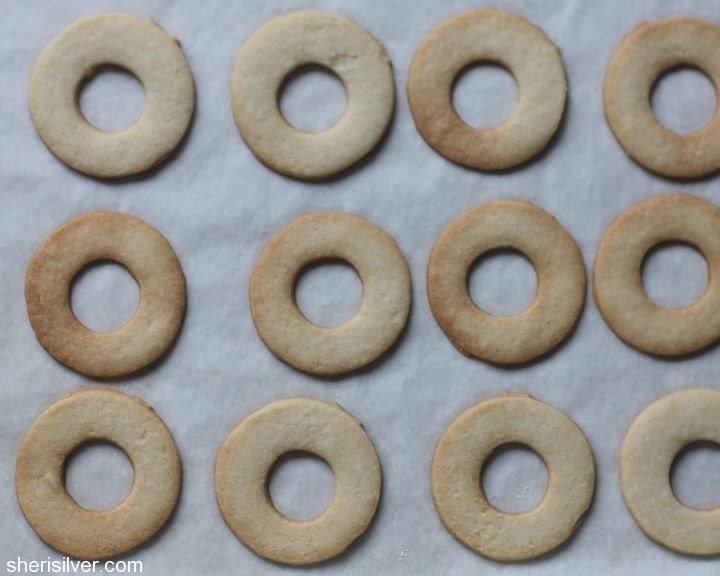
Make the cookies:
Pre-heat oven to 350. Line three baking sheets with parchment paper. Cream butter and sugar in mixer till light and fluffy. Scrape down the sides. Add flour, baking powder and salt and beat just till combined; scrape down the sides. Add milk and vanilla and beat just till dough comes together.
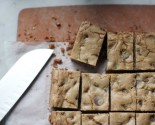
Divide the dough into two equal pieces; roll each half between two pieces of parchment paper to 1/8″ thick. Cut dough into 2″ circles (dipping your cutter in flour between cuts), following with a 1″ cutter to make holes in the centers. Freeze for at least 30 minutes.
Place one sheet of dough onto a cutting board – remove parchment paper. Using a thin spatula, carefully transfer cookies to your prepared baking sheet. Bake for 10-12 minutes, till lightly browned around the edges. Transfer cookies to wire racks to cool completely.
Re-roll scraps until you’ve used up all of the dough. (see Notes)
Keep oven set to 350; line a baking sheet with parchment paper.
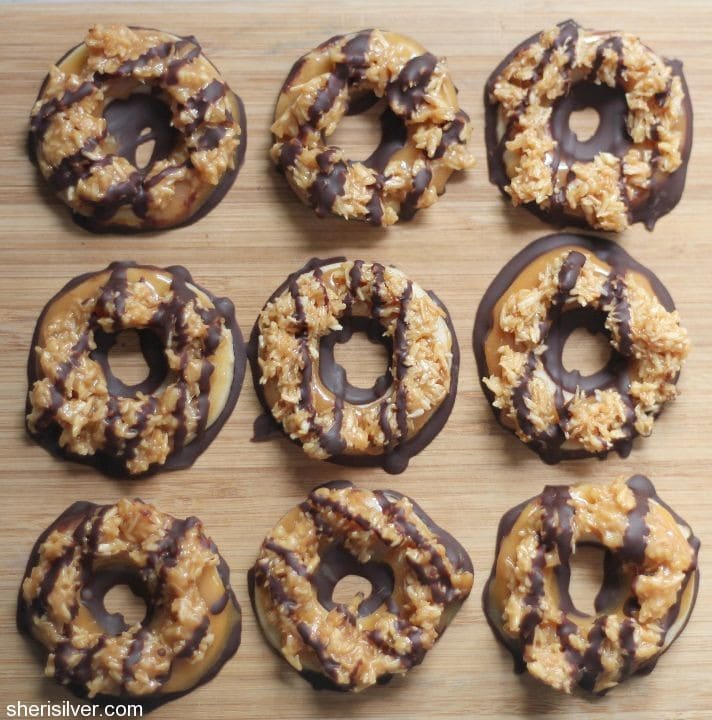
Make the topping:
Spread the coconut onto your prepared baking sheet, and bake till golden brown, stirring occasionally once it begins to color. This can take anywhere from 15 to 30 minutes, so it pays to watch carefully as coconut burns very quickly. Pour toasted coconut into a large bowl and set aside.
Place caramels, milk and salt in the top half of a double boiler set over a saucepan of simmering water. Stir till caramels are smooth and melted. Pour one cup of caramel into a small bowl and add the remaining caramel to the coconut – stir till well combined.
Using an offset spatula, spread reserved caramel onto the tops of each cookie, then follow with a portion of the coconut-caramel mixture (see Notes). Let sit for 30 minutes. Clean and dry the bowl from your double boiler and fill with chopped chocolate.
Prepare two baking sheets with parchment paper; set aside. Prepare a parchment cone and snip a small opening in the bottom.
Melt the chocolate over a saucepan of barely simmering water, stirring till smooth and melted. Dip the bottoms of the cookies in the chocolate and place on your prepared sheets. Pour the remaining chocolate into your parchment cone and drizzle over the tops of the cookies (see Notes). Refrigerate till chocolate is set.
Notes:
If you can’t find unsweetened coconut, don’t sweat it – sweetened is fine.
I know – you’re saying, “Sheri – didn’t you JUST make your own homemade caramels?” Why, yes I did. And they were a LOT of work. And I had no intention of melting them, mixing them with coconut and topping them with chocolate. These cookies were enough work as it is and the packaged caramels were perfect, thank you very much.
I got almost five dozen cookies from this recipe – as the topping only covers about 48, you will have leftover “naked” cookies – which you can use as you see fit. They freeze beautifully if you want to save them for another time. They’re delicious.
The extra step of spreading the plain melted caramel on the cookies prior to adding the coconut is an important one. The coconut topping will not – I repeat, WILL NOT – adhere to the cookie otherwise. Props to Just a Taste for this genius tip.
If you don’t want to make a parchment cone, you can use a spoon or fork to drizzle the chocolate. Alternatively, you can transfer the chocolate to a heavy duty ziploc bag and snip a tiny opening in the corner.
This delicious recipe brought to you by Sheri Silver
https://sherisilver.com/2013/04/29/d-i-y-samoas/
20 Comments
Leave a Comment

Hi! I'm Sheri!
Welcome to my little corner of the web where you’ll find easy, delicious recipes, the best kitchen hacks and simple tips for turning your home into a clean haven that is free of toxins. So glad you’re here!

Insanity! These look amazing. Even though I’m a thin mint girl.
Thin Mints? Is this the great divide for us? 😉
Definitely not! If you made some Samoas for me, I would happily indulge. XO.
A true friend indeed….xo
I love Samoas and Tagalongs. I’m so with you on chocolate and mint-would only eat in a chocolate emergency. These look amazing.
A chocolate emergency – love that! Thank you! xo
No. Way.
You totally rock!
Blushing; thank you! xo
Impressive. Go team Samoas.
Yes! 🙂
Can’t we all just get along?!
These look awesome, Sheri. And thank you for confirming my suspicion: they seem like they’d be more trouble to make than I’m willing to tolerate. You did a fantastic job and I envy your family’s access to your larder.
🙂 Thanks Drew – from what Melanie tells us it seems like you do your fair share too!
THESE look fabulous. So very yummy {and I chuckled to myself (because I always make myself laugh) that perhaps you were the girl scouts were sponsoring you haha re: your post last week about sponsorship}.
have a great monday
xo
Ha! Could you imagine? 🙂 Thanks so much Rebecca! xo
Ha! I guess I should proofread my comments. Oh my! that was totally readable so I am glad you at least got the jist of it! xo
Loud and clear! 😉
YUUUUM!! I’ve been wanting to make these for so long! Love your pictures!
Wow! Thanks so much! 🙂
Tried it and the cookie came up super dry. Tried it again and it was the same. dry.
Anything i can do to prevent that?
I’m surprised – that’s my tried-and-true shortbread recipe which – at 2 sticks of butter – is always very tender! Did you make any changes to the ingredients?